Getting Started with Great Lakes
Content
Available Resources
You must connect to MWireless or U-M VPN to access Great Lakes.
Compute
- Great Lakes
- Shared requestable servers
- ~4,000 CPU hours (~560 GPU hours) for the whole semester
- Expect some wait time for GPUs during peak hours and around finals
- The availability depends on the resource and the amount of time requested. If the wait time is too long, try reducing the requested time or switching to another partition.
- All the GPUs on Great Lakes are fast enough for most cases.
- We can only use up to five GPUs as a whole at the same time. Please terminate your session when you finish your work so that others can access the GPUs.
Storage
- Home directory
- 80 GB limit per user
- Available at
/home/{UNIQNAME}
- Scratch space
- 10TB limit as a whole
- Data may be removed if not used in 30 days
- Available at
/scratch/pat464564w26_class_root/pat464564w26_class/{UNIQUENAME}
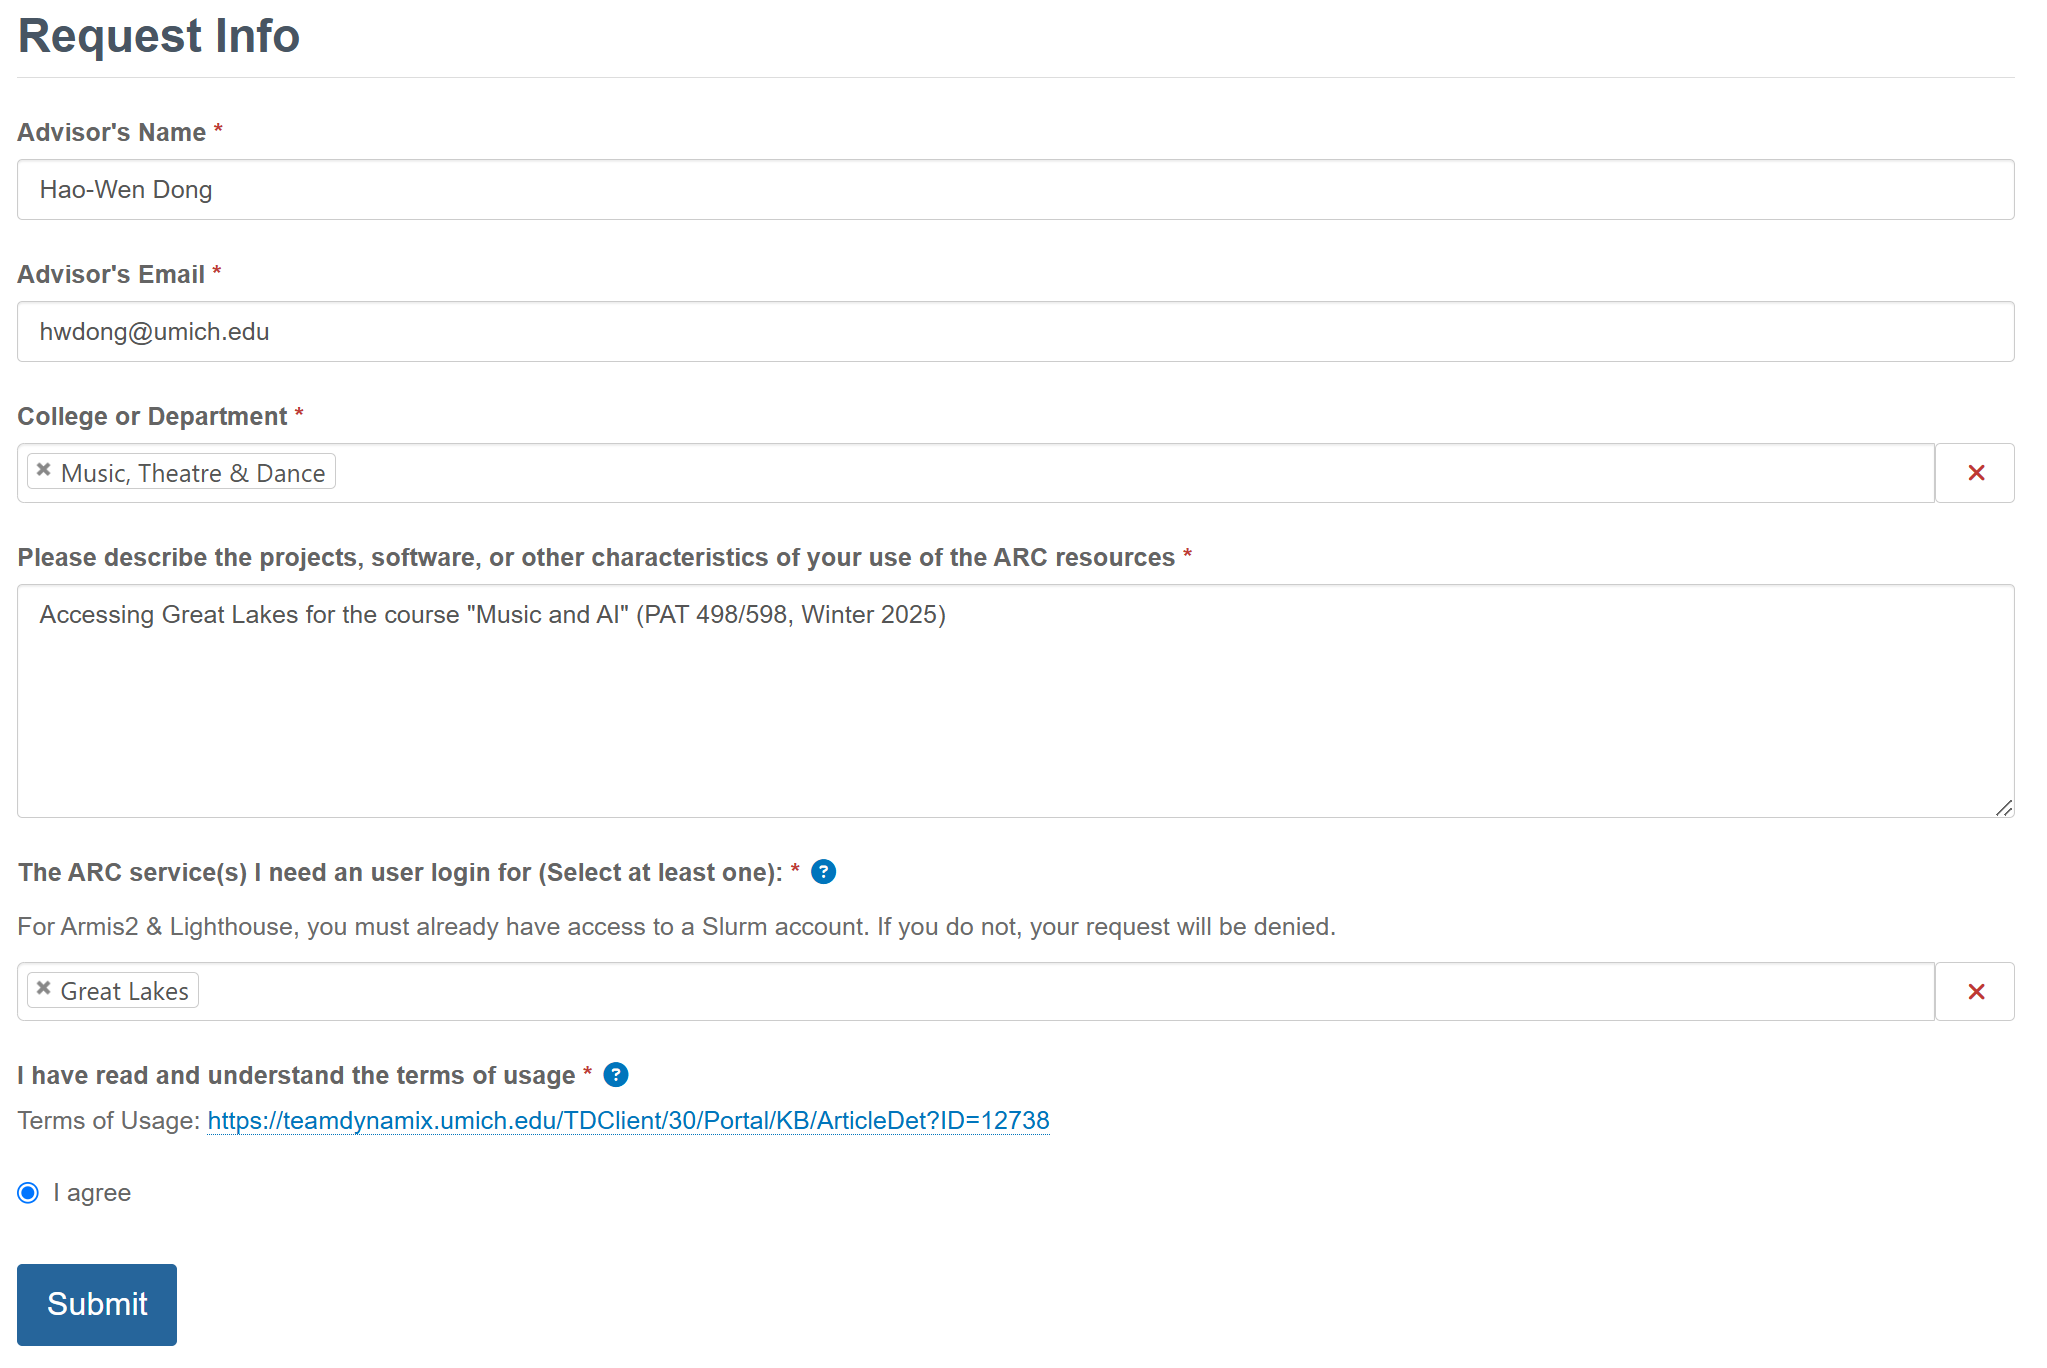
Creating an ARC Account
-
Request an HPC login here
Please put “Accessing Great Lakes for the course “Generative AI for Music and Audio Creation” (PAT 464/564, Winter 2026)” in the request.
-
Log into your account in the web portal
You must connect to MWireless or U-M VPN to access Great Lakes.

Configuration
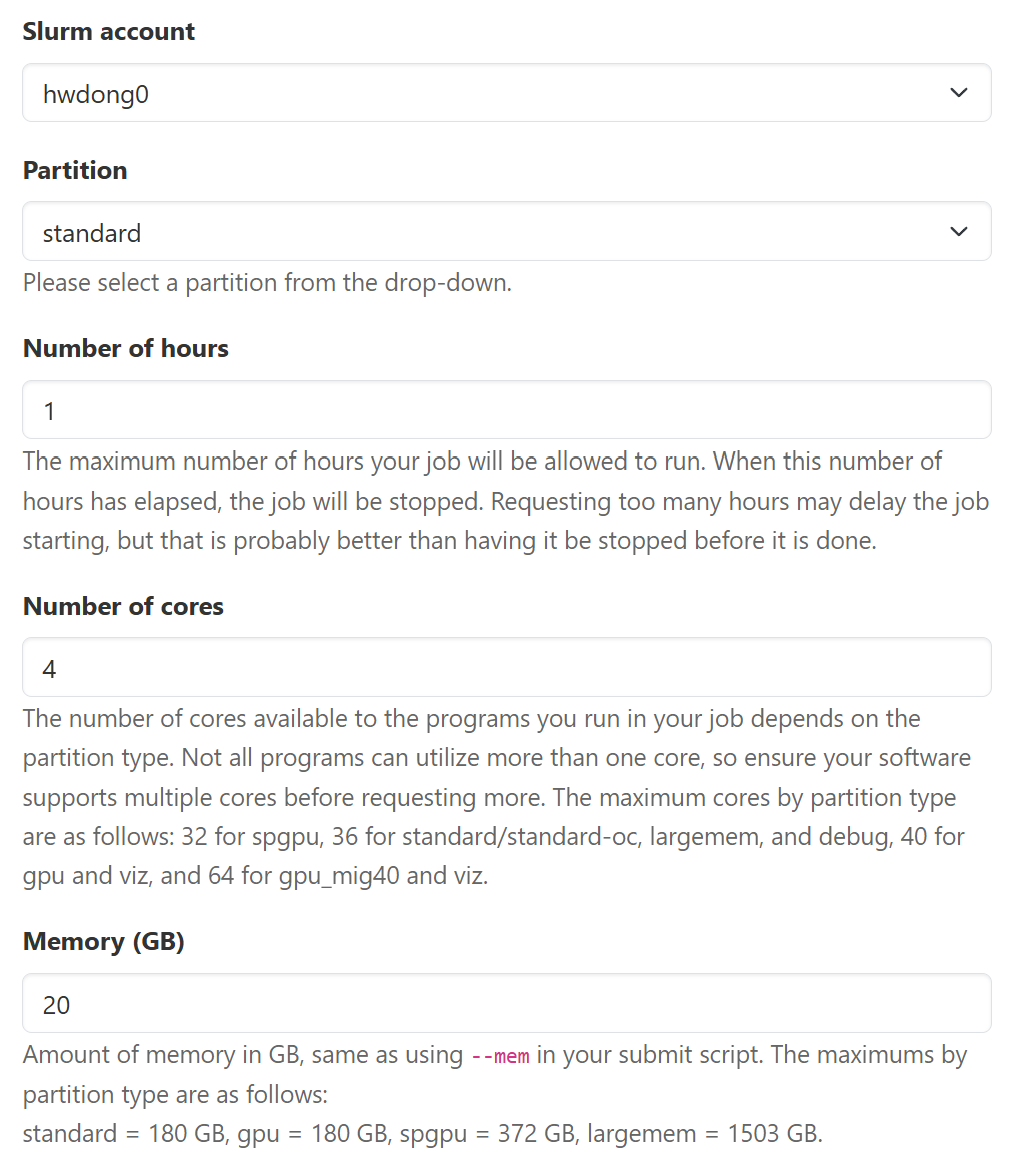
Recommended Configuration for CPU-only Workloads
- Partition: standard
- Number of cores: 4 / 8 / 16 / 36
- Memory (GB): 28 / 56 / 112 / 180
Click to show the screenshot
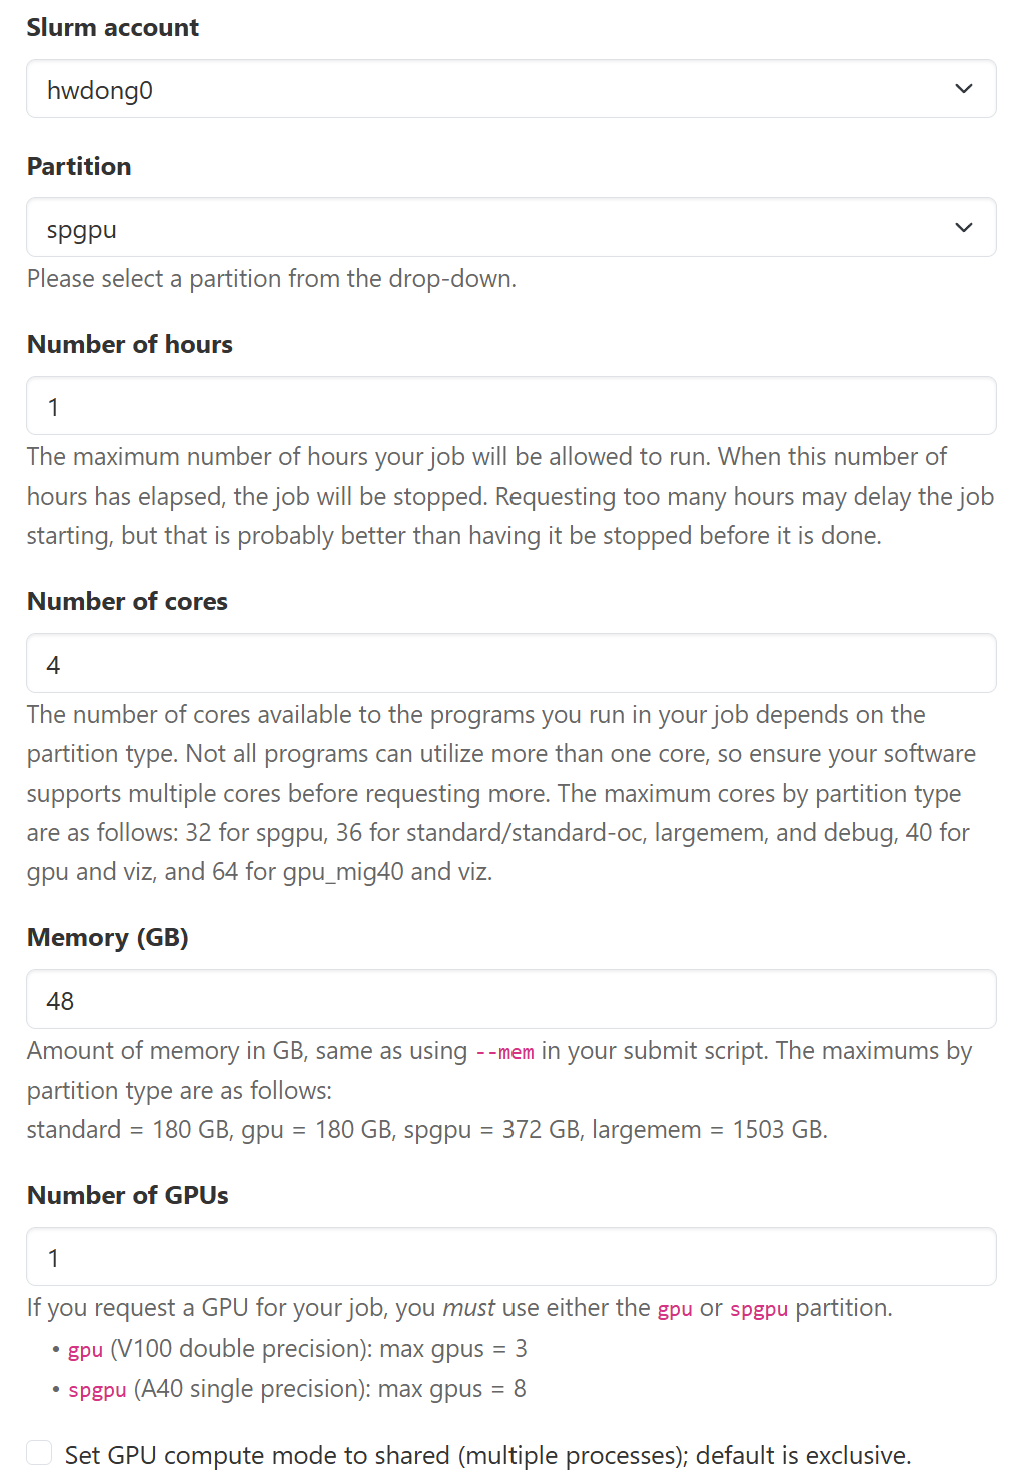
Recommended configuration for GPU Workloads
There are three GPU-available partitions.
spgpuis usually the one with the least wait time, which has 224 NVIDIA A40 GPUs (48GB VRAM). Onspgpu, you can request 4 CPUs and 48 GB RAM without extra cost for each GPU requested on thespgpupartition, so the following is the most cost-effective option.
- Partition:
spgpu - Number of cores: 4
- Memory (GB): 48
Click to show the screenshot
Other configurations
For each GPU requested, Great Lakes provides some CPU cores and RAM memory without additional charge. Please use the following configurations for each partition to maximize the freely-provided CPUs and memory (as of Winter 2025; see the current configurations):
| Partition | CPU cores | Memory (RAM) | GPU | GPU speed | GPU memory | #GPUs available |
|---|---|---|---|---|---|---|
| spgpu | 4 | 48 GB | A40 | faster | 48 GB | 224 |
| gpu_mig40 | 8 | 124 GB | A100 | fastest | 40 GB | 16 |
| gpu | 20 | 90 GB | V100 | fast | 16 GB | 52 |
| standard* | 1 | 7 GB | - | - | - | - |
Here is the cost for each partition (as of Winter 2025; see the current rates):
| Partition | Hourly cost | CPU hours equivalent |
|---|---|---|
| spgpu | 0.11 | 7.33 |
| gpu_mig40 | 0.16 | 10.66 |
| gpu | 0.16 | 10.66 |
| standard* | 0.015 | 1 |
Launching a Session
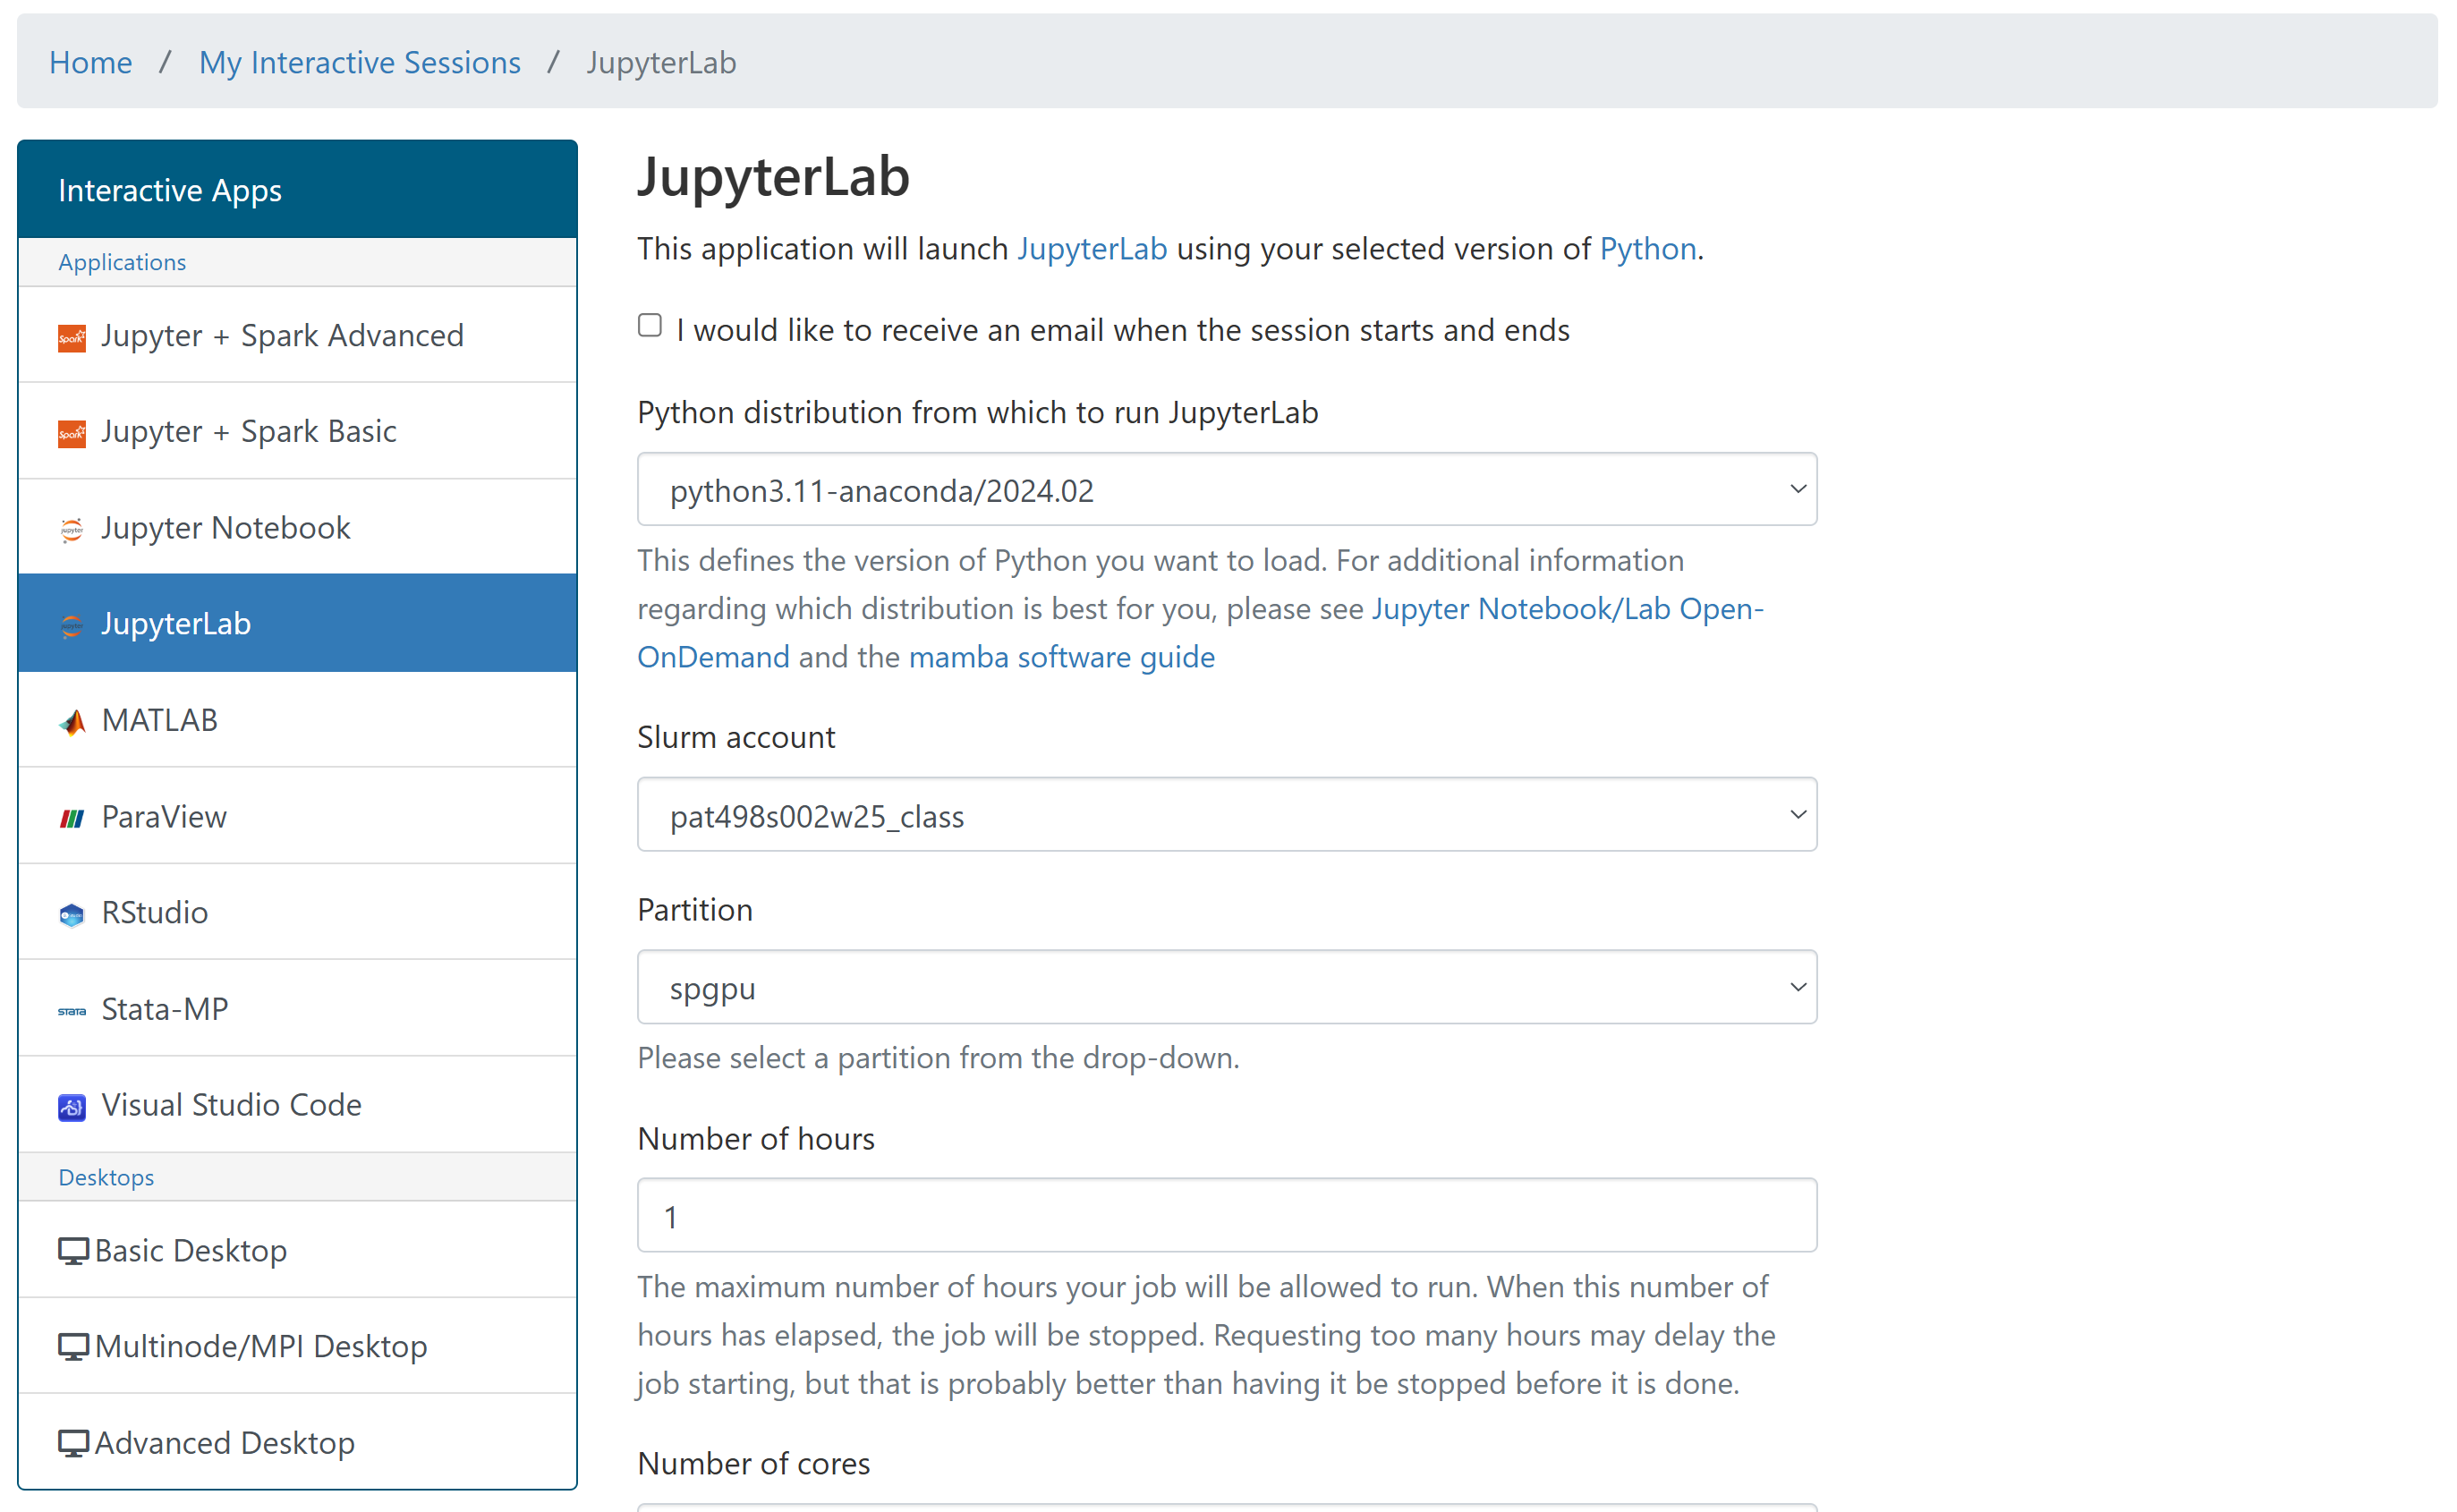
Launching an Interactive Session
- Navigate to “Interactive Apps” on the web portal
-
Select the application
You’ll likely want to select “JupyterLab” for the assignments.

-
Specify the configuration of the instance (see above for suggestions)
If you’re unsure, select “python3.11-anaconda/2024.02” as your Python distribution.
Also, make sure to select “pat464564w26_class” as the slurm account so that the cost is charged to the right account.
-
Connect to the launched instance
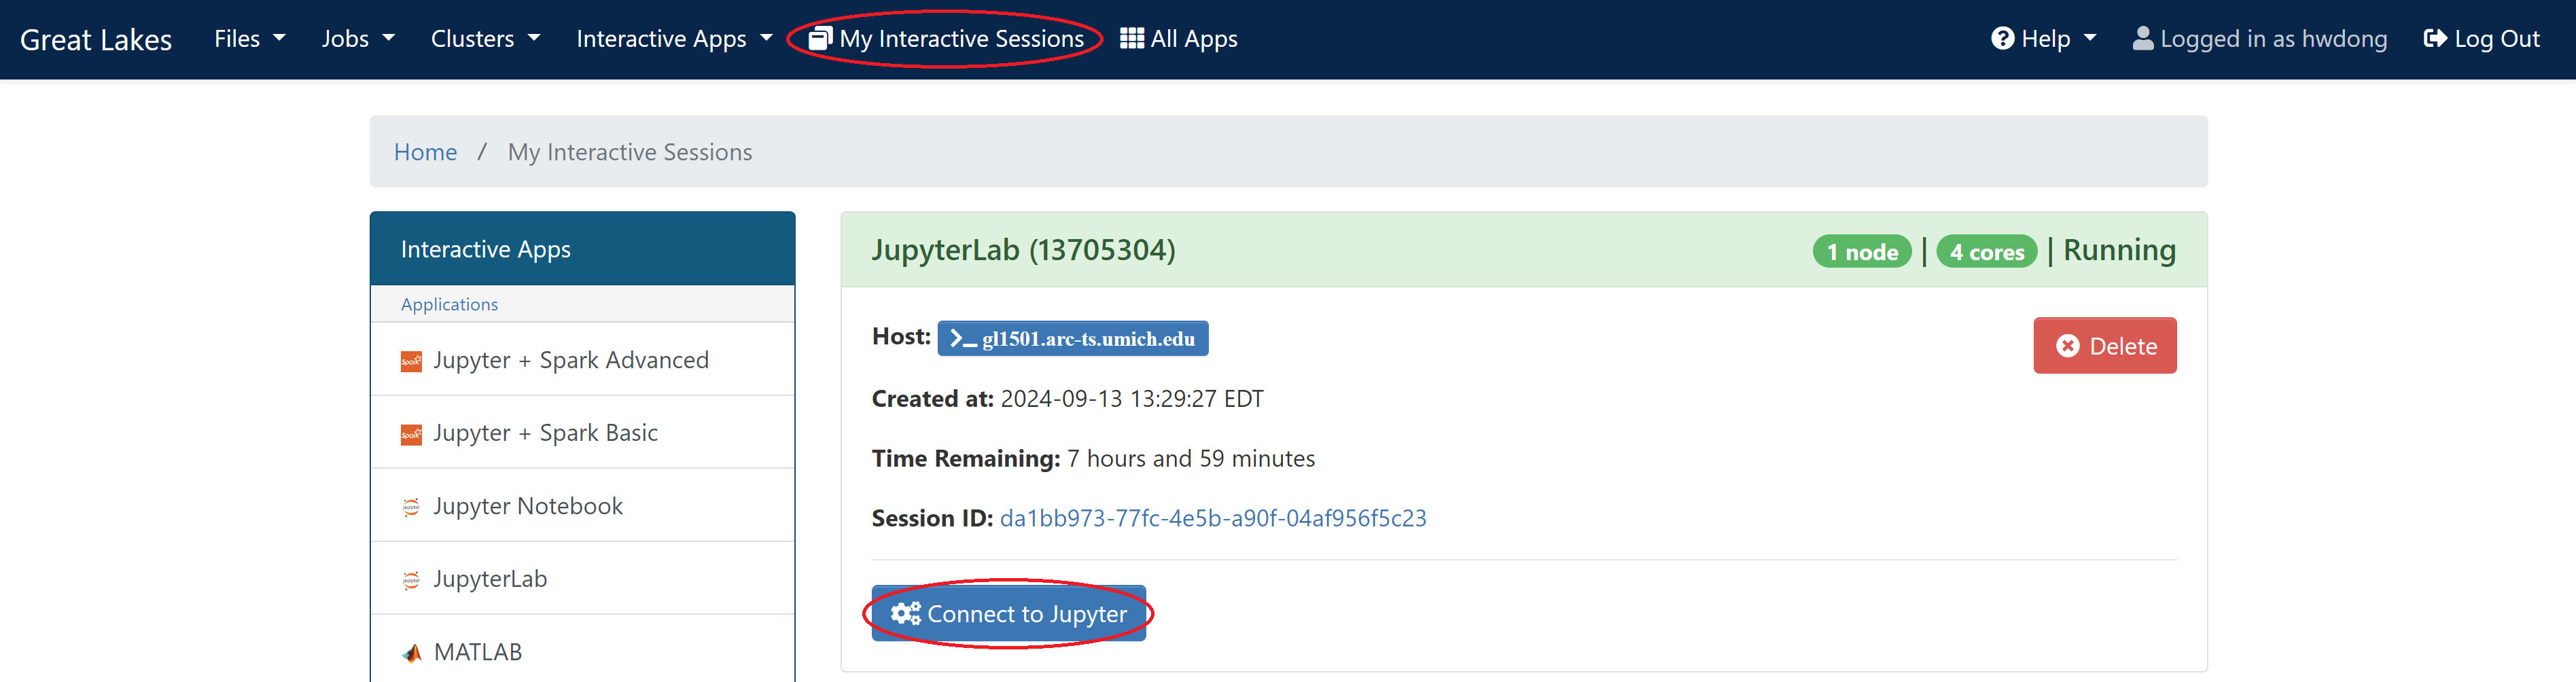
- Make sure to delete the job if your workload is finished earlier
Launching an SSH Session
This will create a persistent compute node that won’t end automatically. Please make sure to kill the job after your workload is finished so that the resources are released.
-
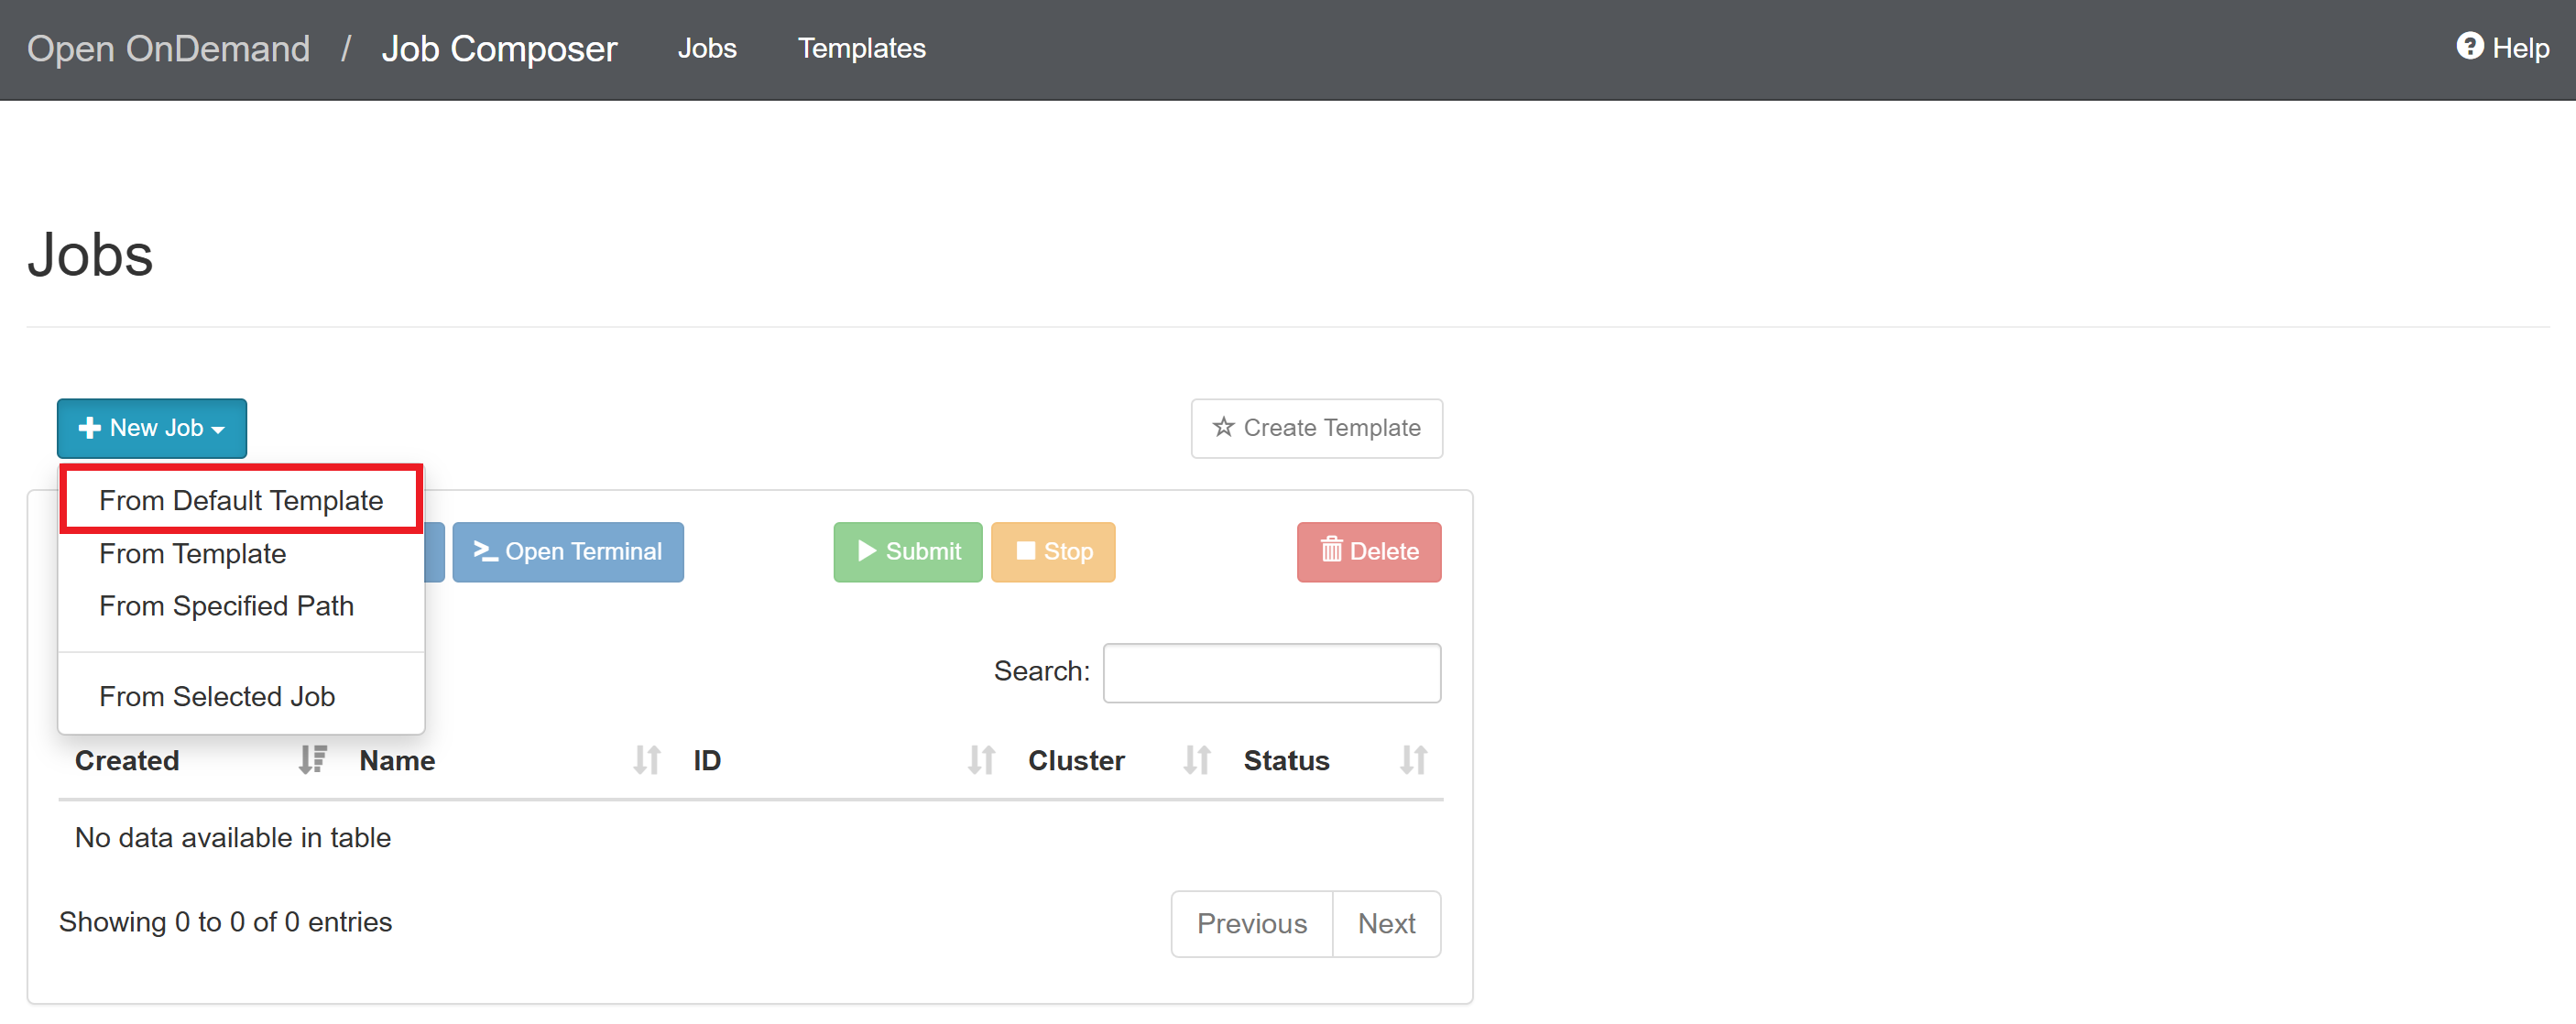
Navigate to “Job Composer” on the web portal for Great Lakes

-
Click “New Job > From Default Template”
-
Click “Open Editor”
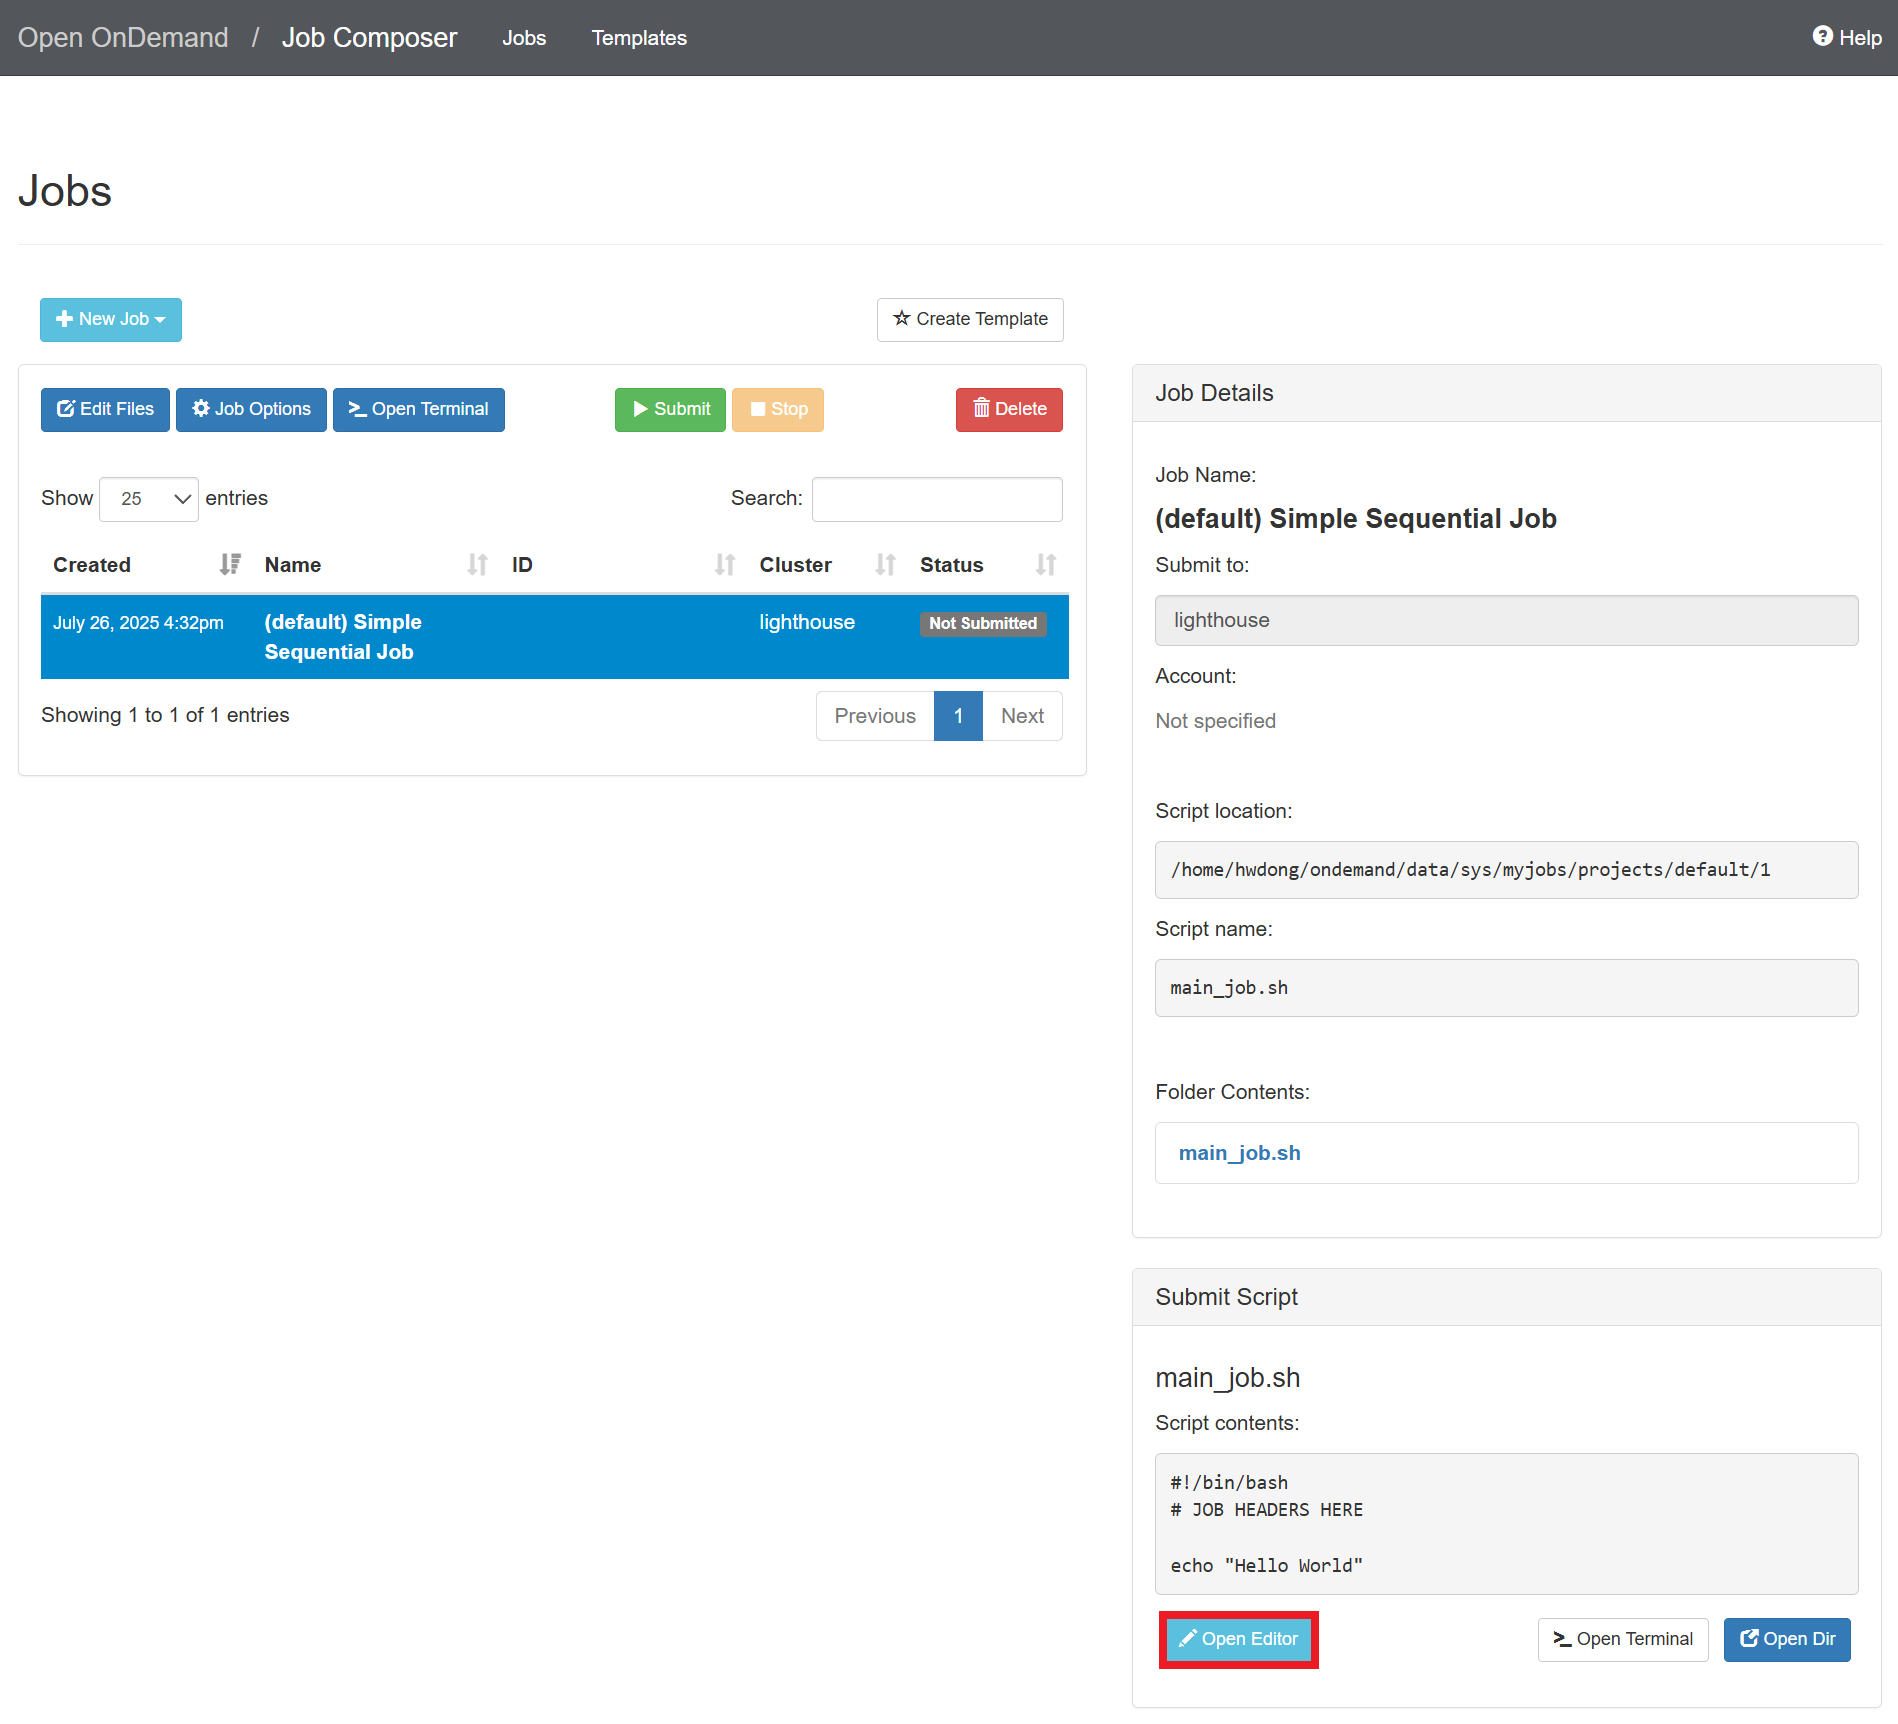
-
Replace everything in the editor with the following and click “Save”
This will request 1 GPU with 4 CPUs and 48 GB RAM for 2 hours on Great Lakes. Adjust the time limit (in the format of
D-HH:MM:SS) if the wait time is too long. See above for configuration suggestions.#!/bin/bash #SBATCH --account=pat464564w26_class #SBATCH --partition=spgpu #SBATCH --cpus-per-task=4 #SBATCH --mem=48G #SBATCH --gres=gpu:1 #SBATCH --time=2:00:00 echo $SLURMD_NODENAME tail -f /dev/null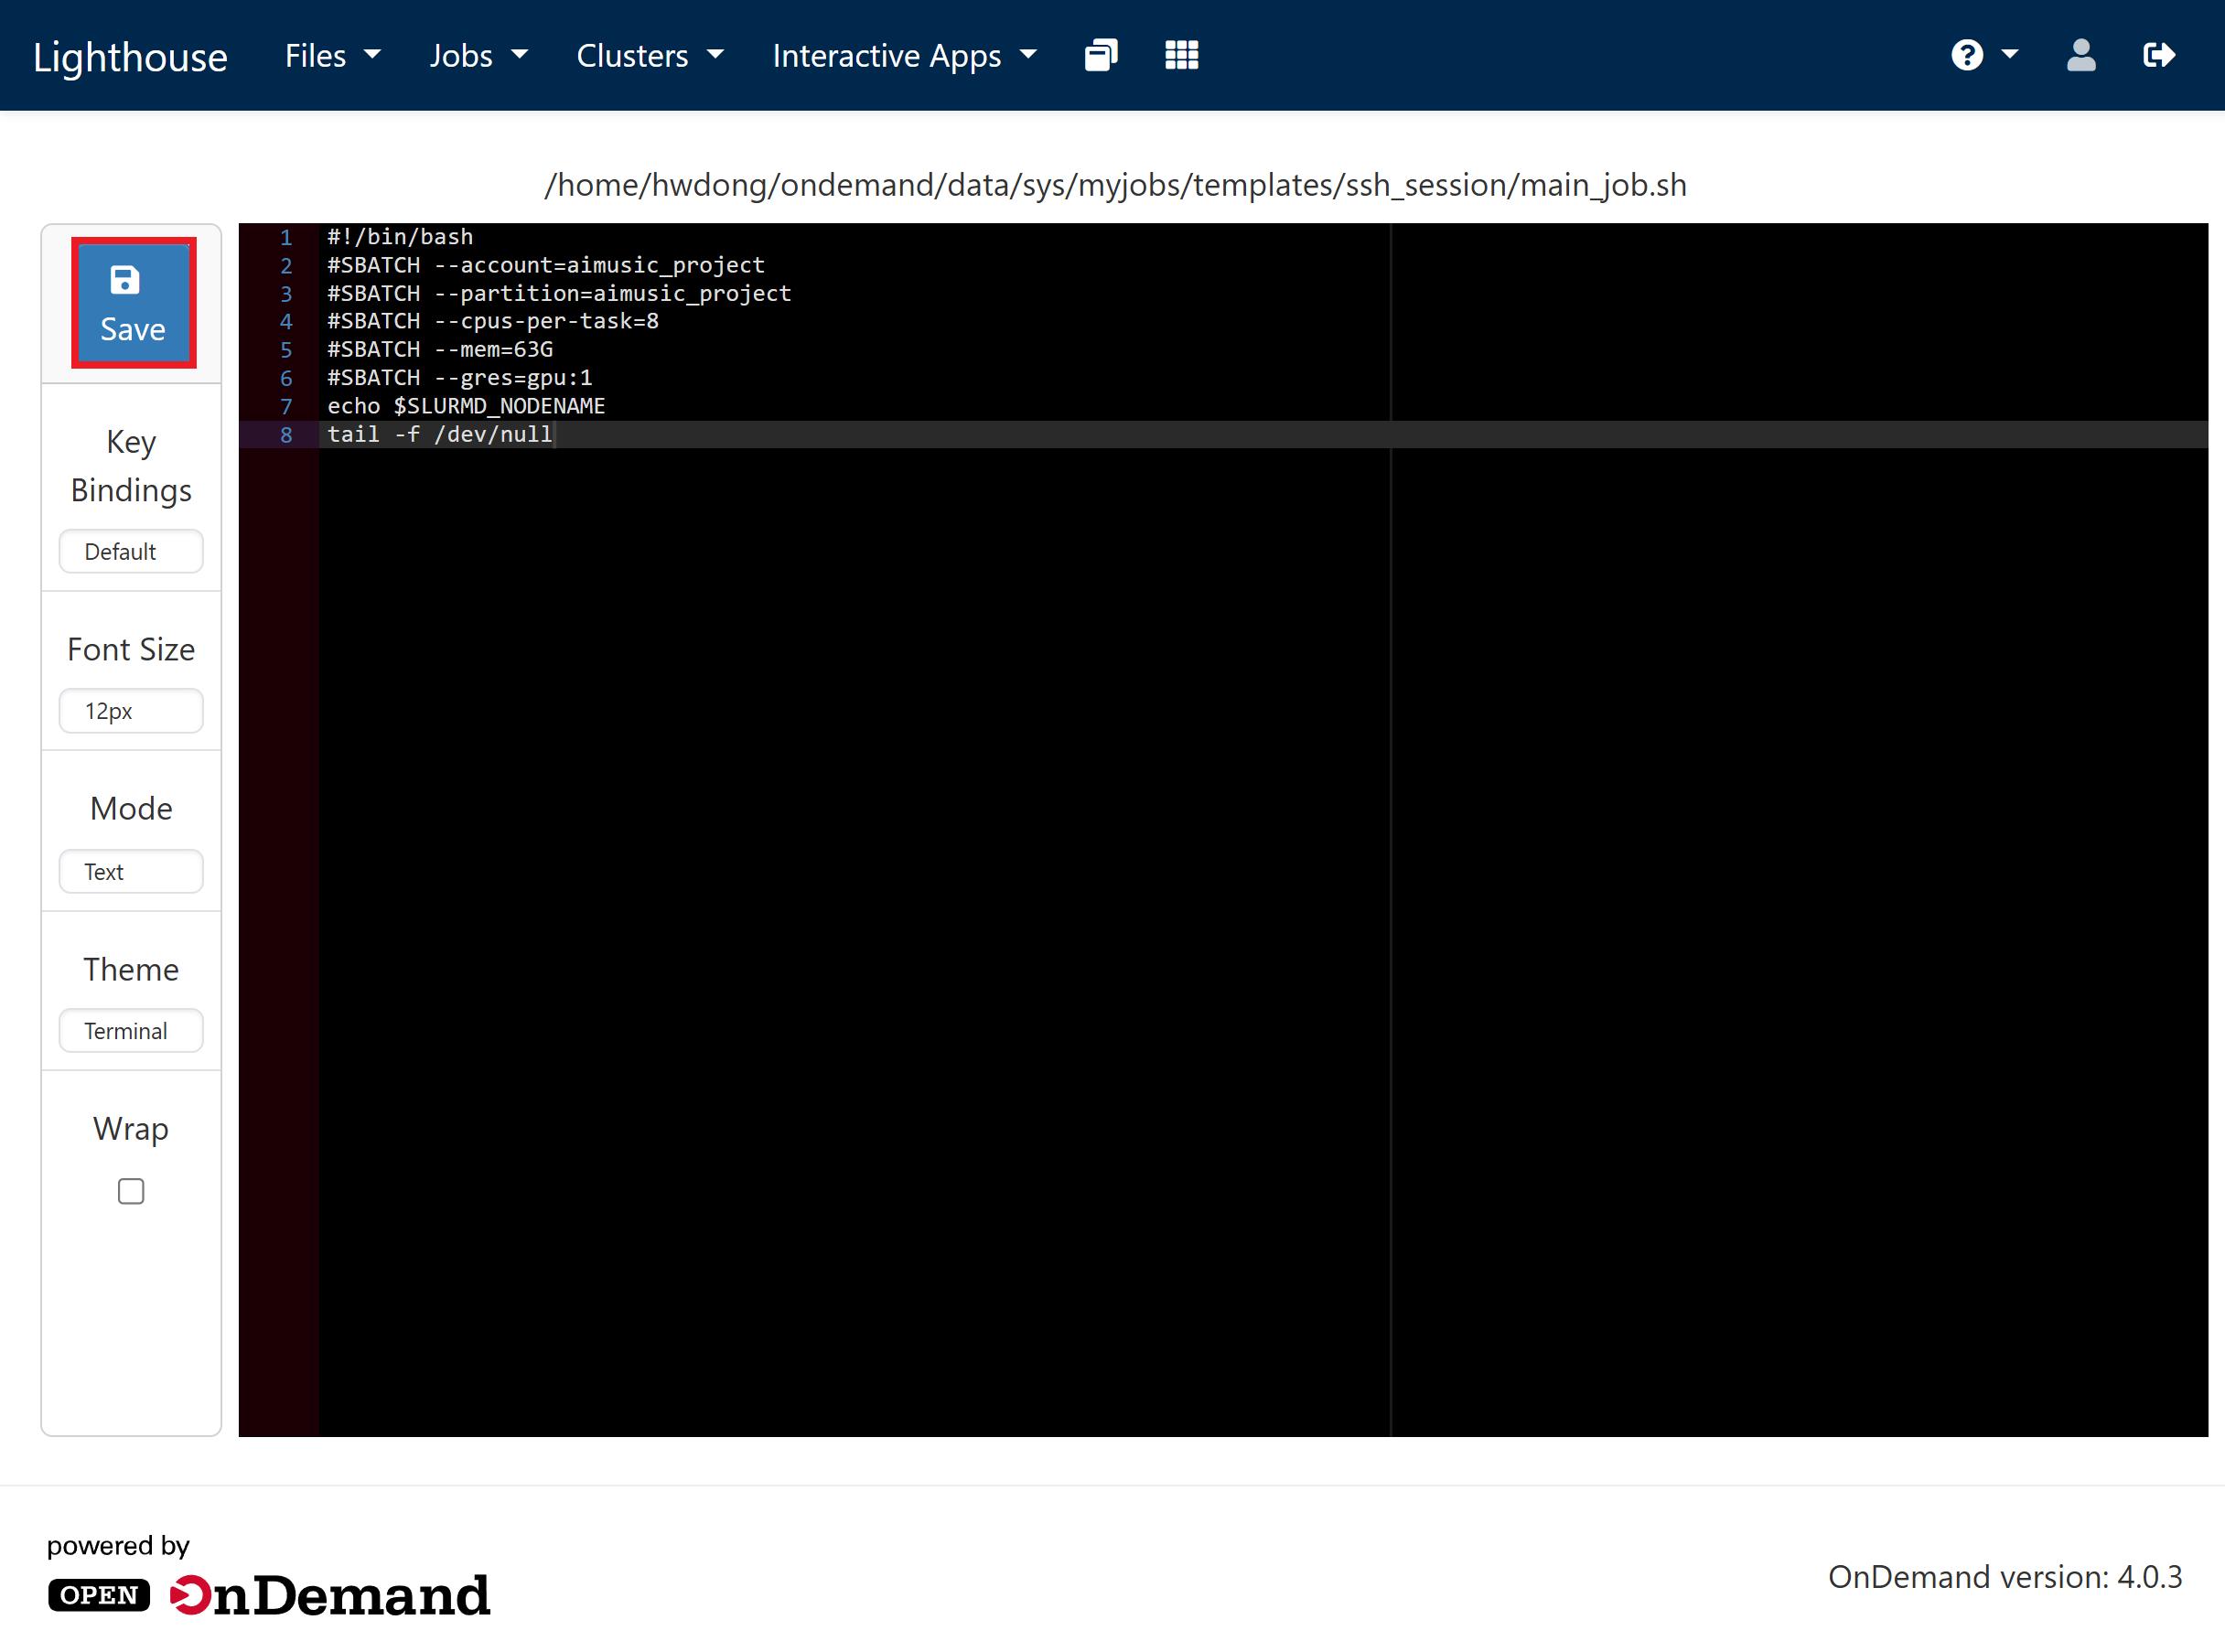
-
In the “Jobs” tab, select the created job and click “Submit”
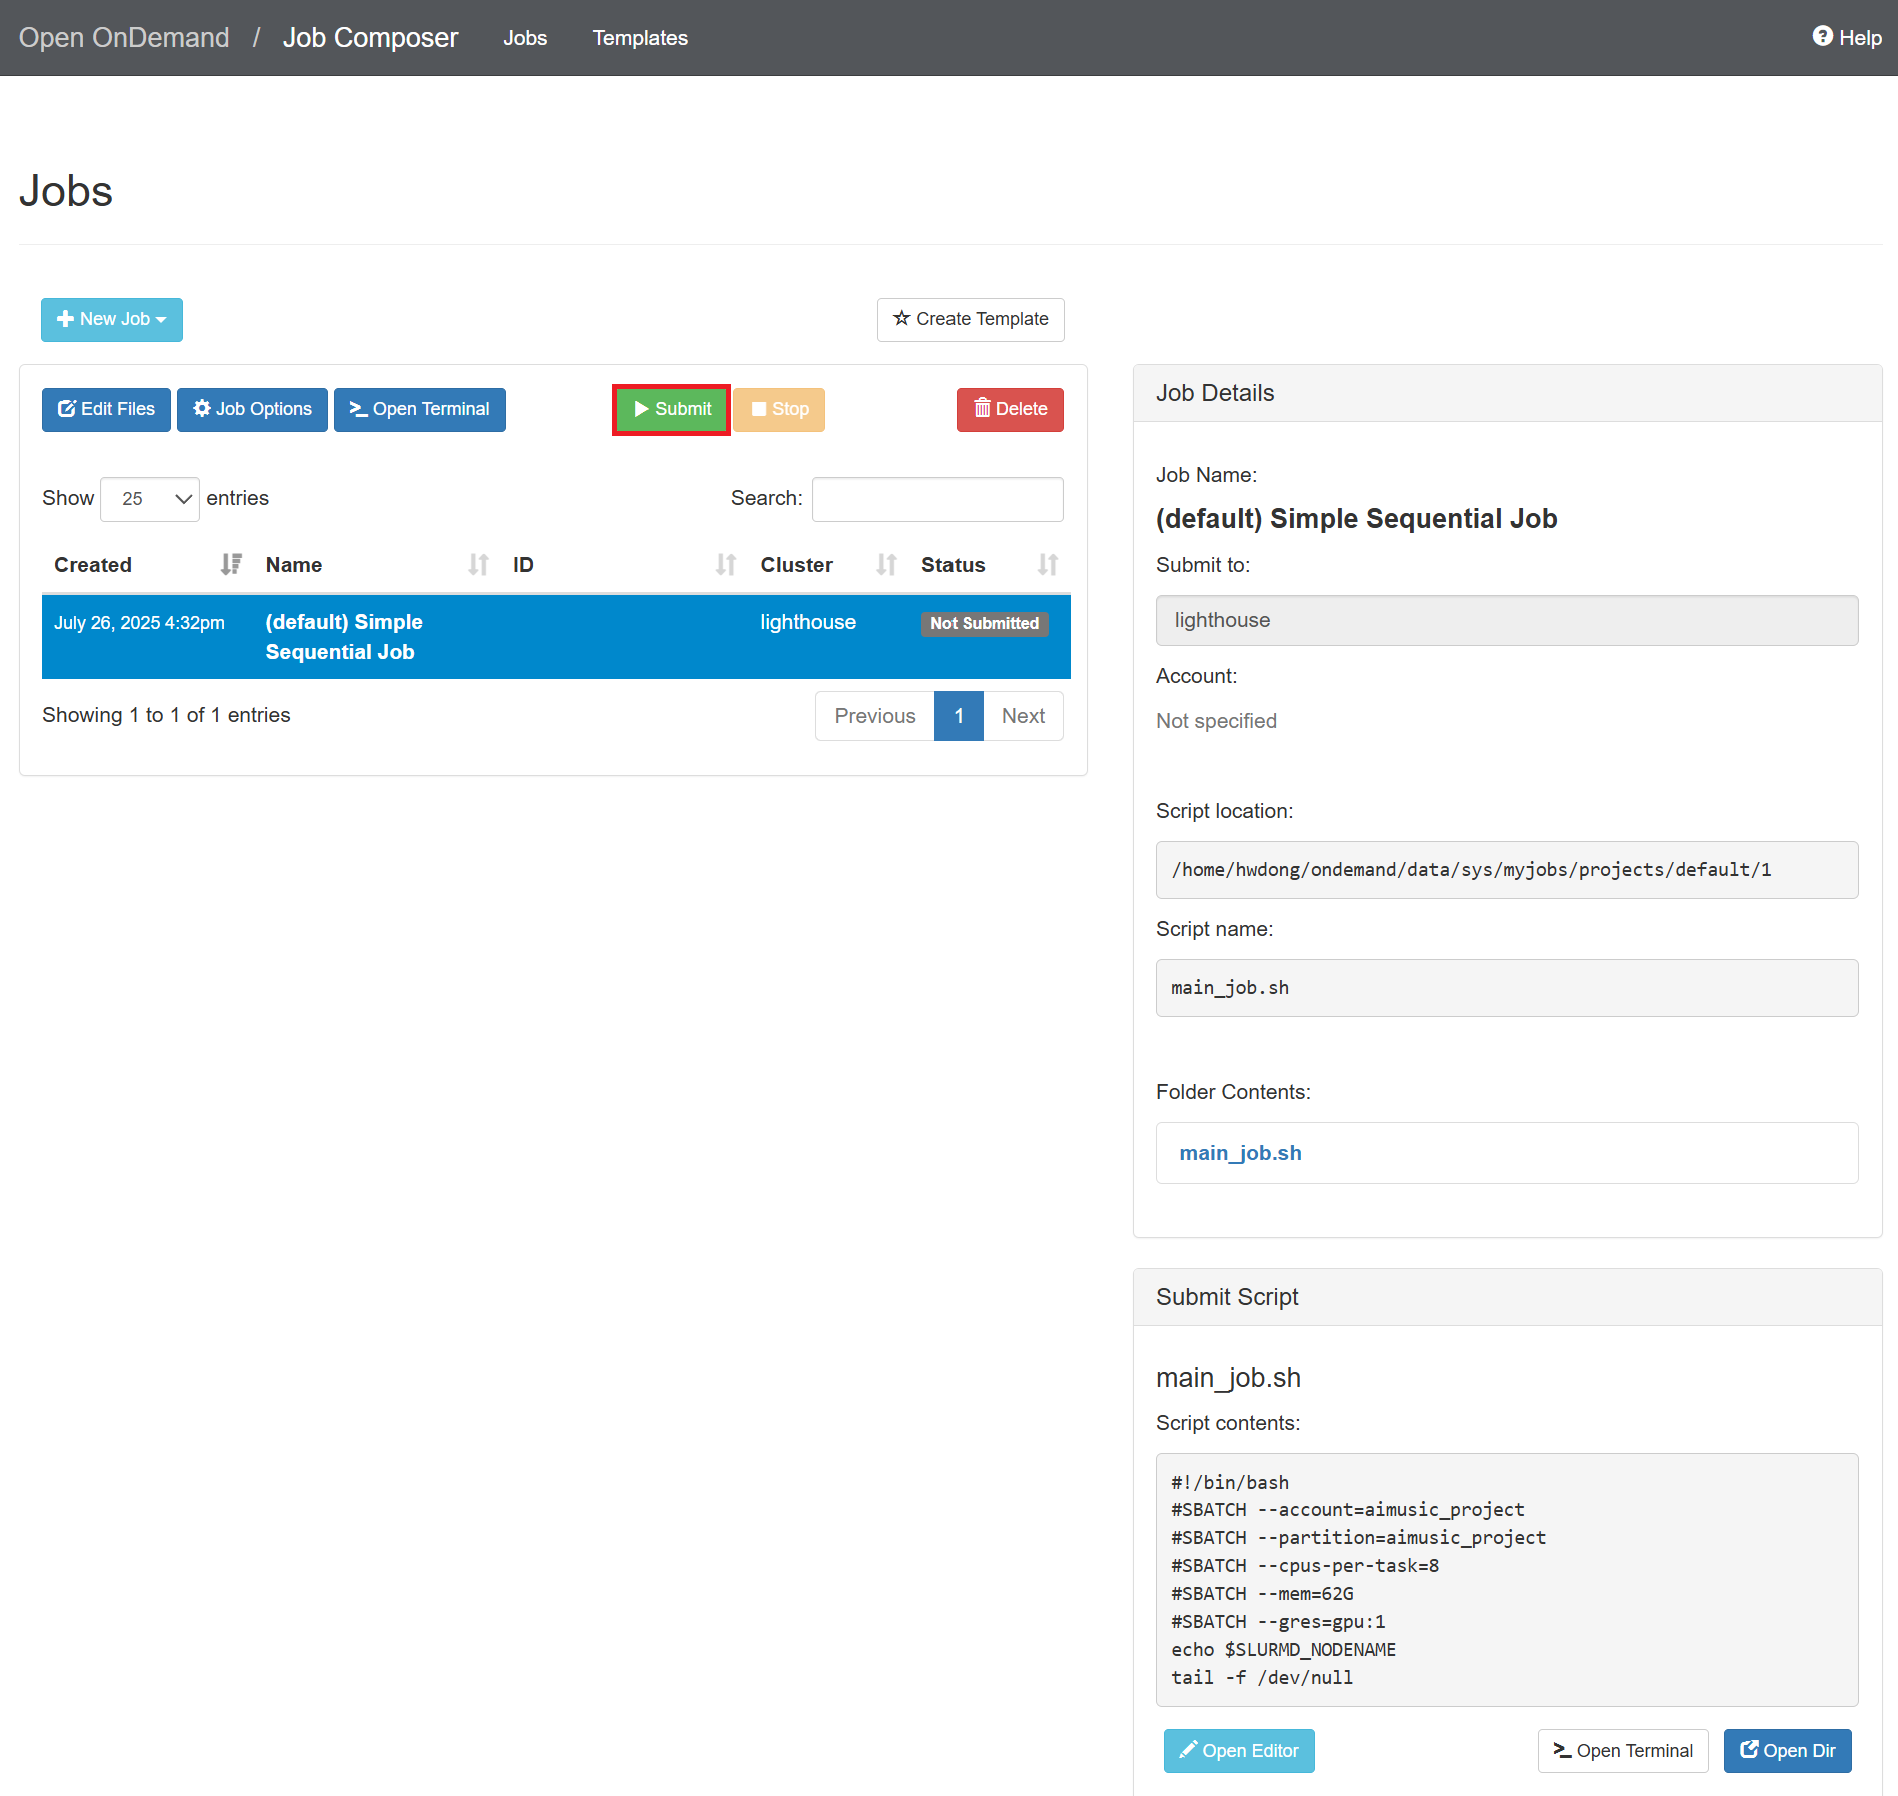
-
At the right panel, click the “slurm-{ID}.out” file
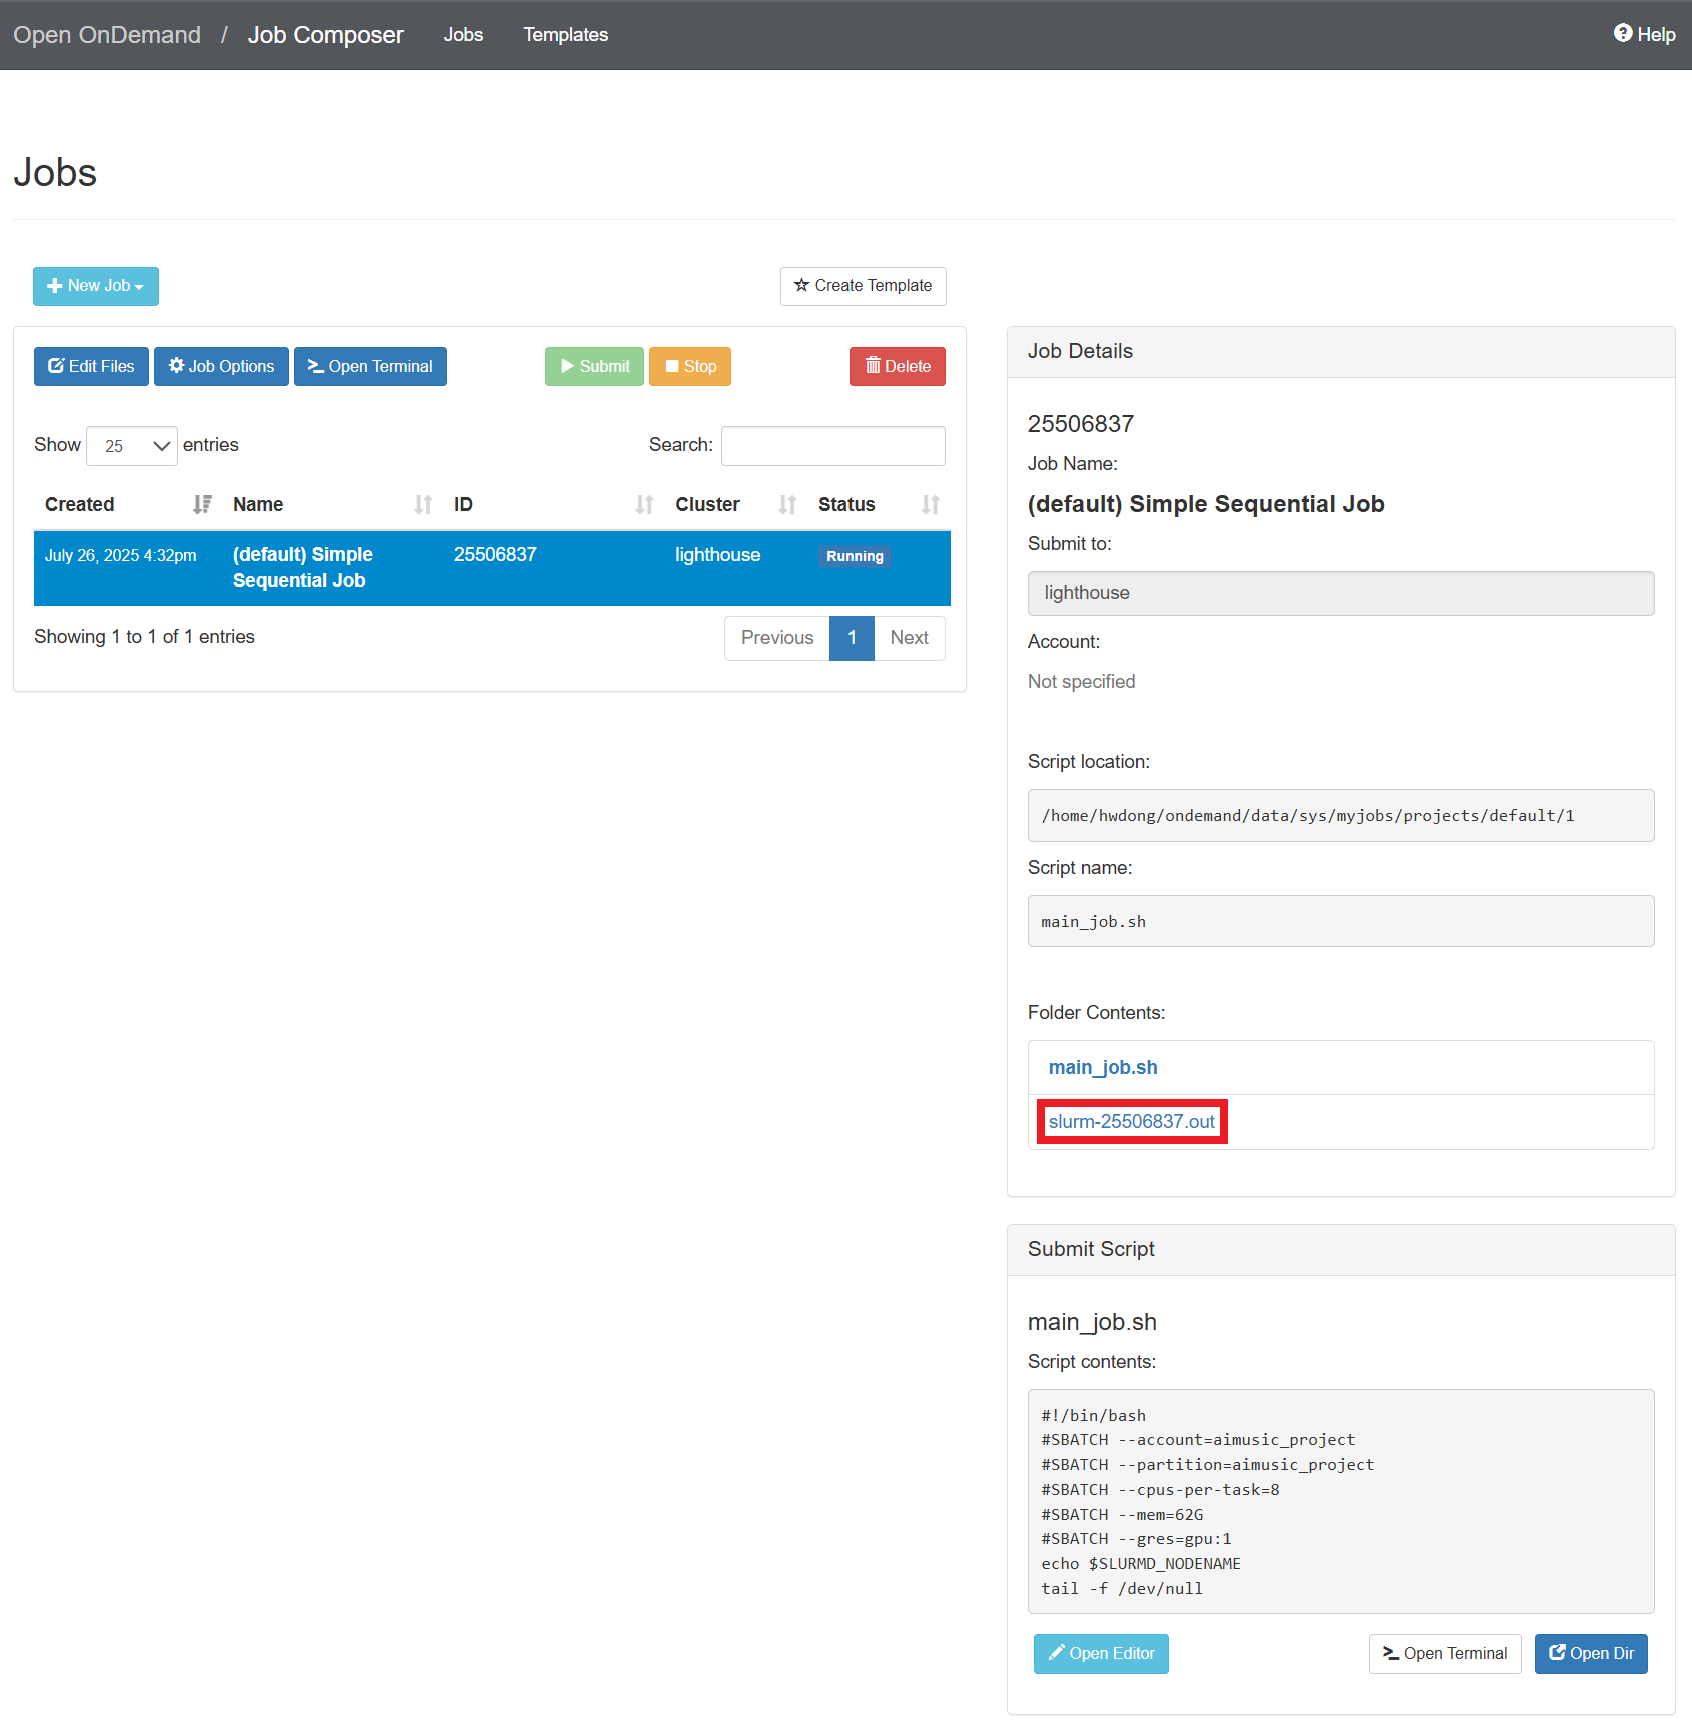
-
Copy the node name
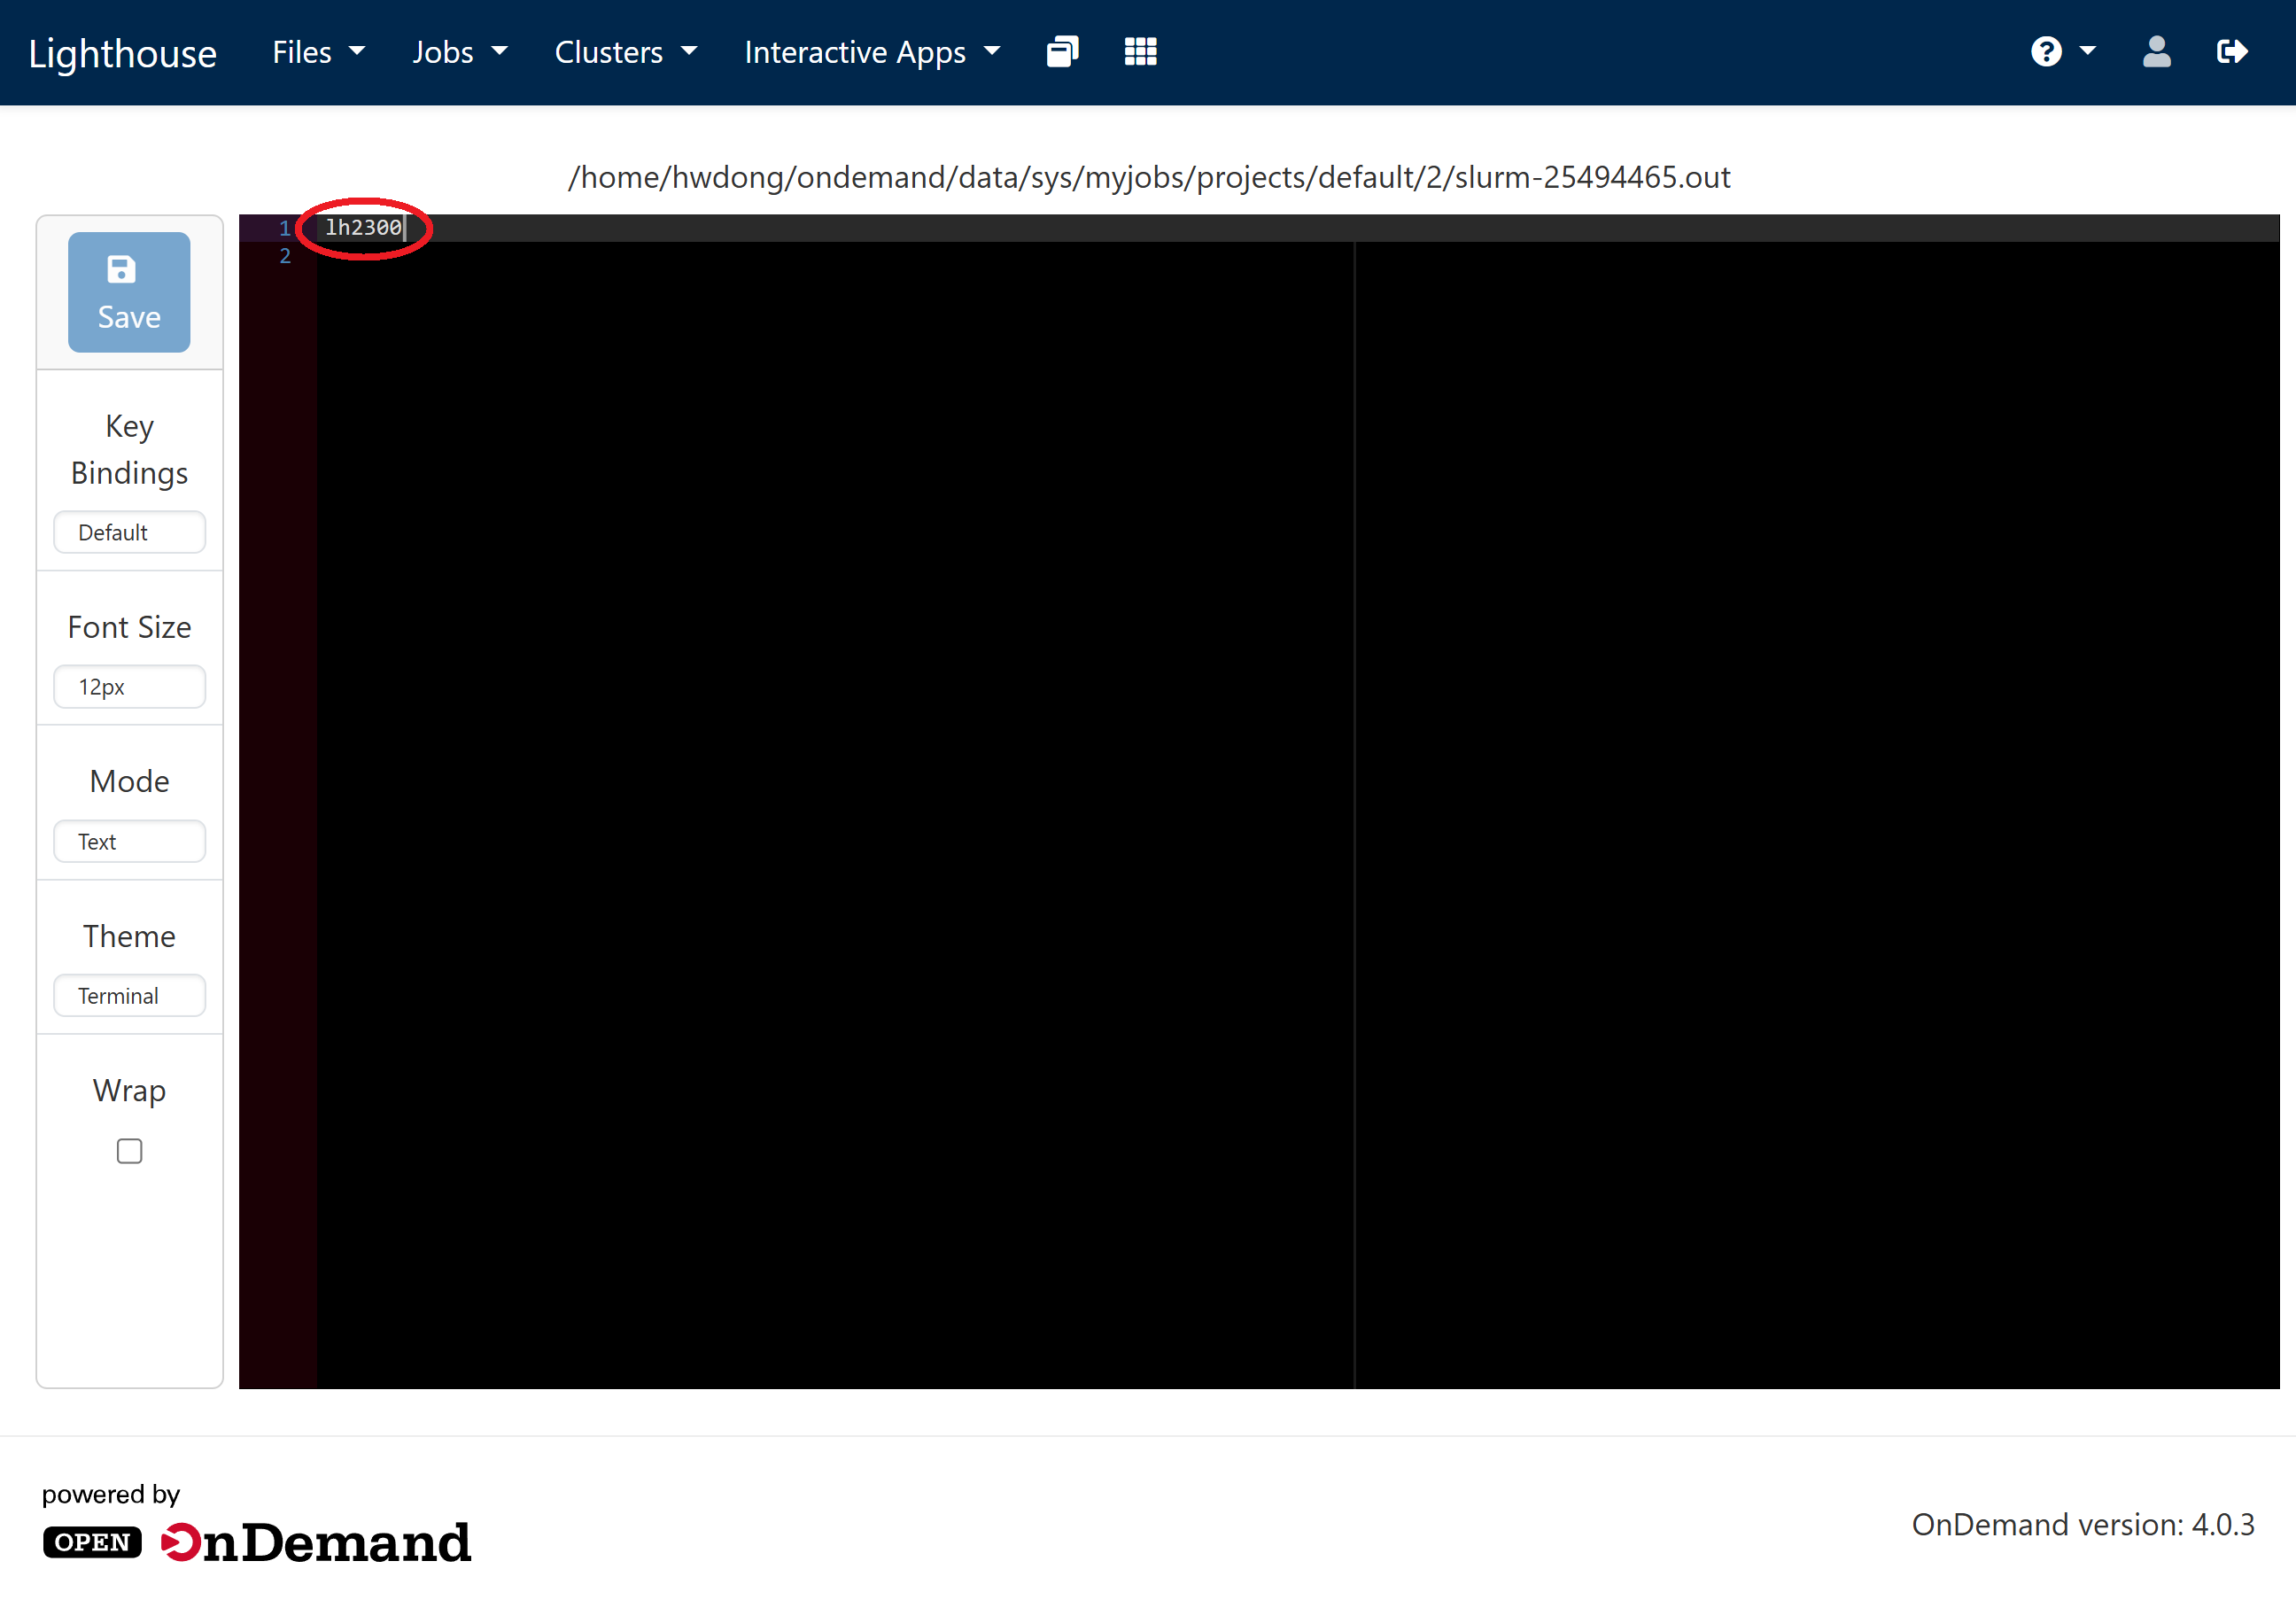
-
To access the compute node, you will need to first SSH into the login node
ssh {UNIQNAME}@greatlakes.arc-ts.umich.eduAnd then you can SSH into the compute node
ssh {NODENAME}.arc-ts.umich.eduClick to show how to set up the SSH configuration file
Add the following lines to the SSH configuration file (usually at
~/.ssh/config):For Lighthouse:
Host lighthouse-login
   HostName lighthouse.arc-ts.umich.edu
   User {UNIQNAME}

Host lighthouse
   HostName lh2300.arc-ts.umich.edu
   User {UNIQNAME}
   ProxyJump lighthouse-login
For Great Lakes:
Host greatlakes-login HostName greatlakes.arc-ts.umich.edu User {UNIQNAME} Host gl*.arc-ts.umich.edu User {UNIQNAME} ProxyJump greatlakes-login -
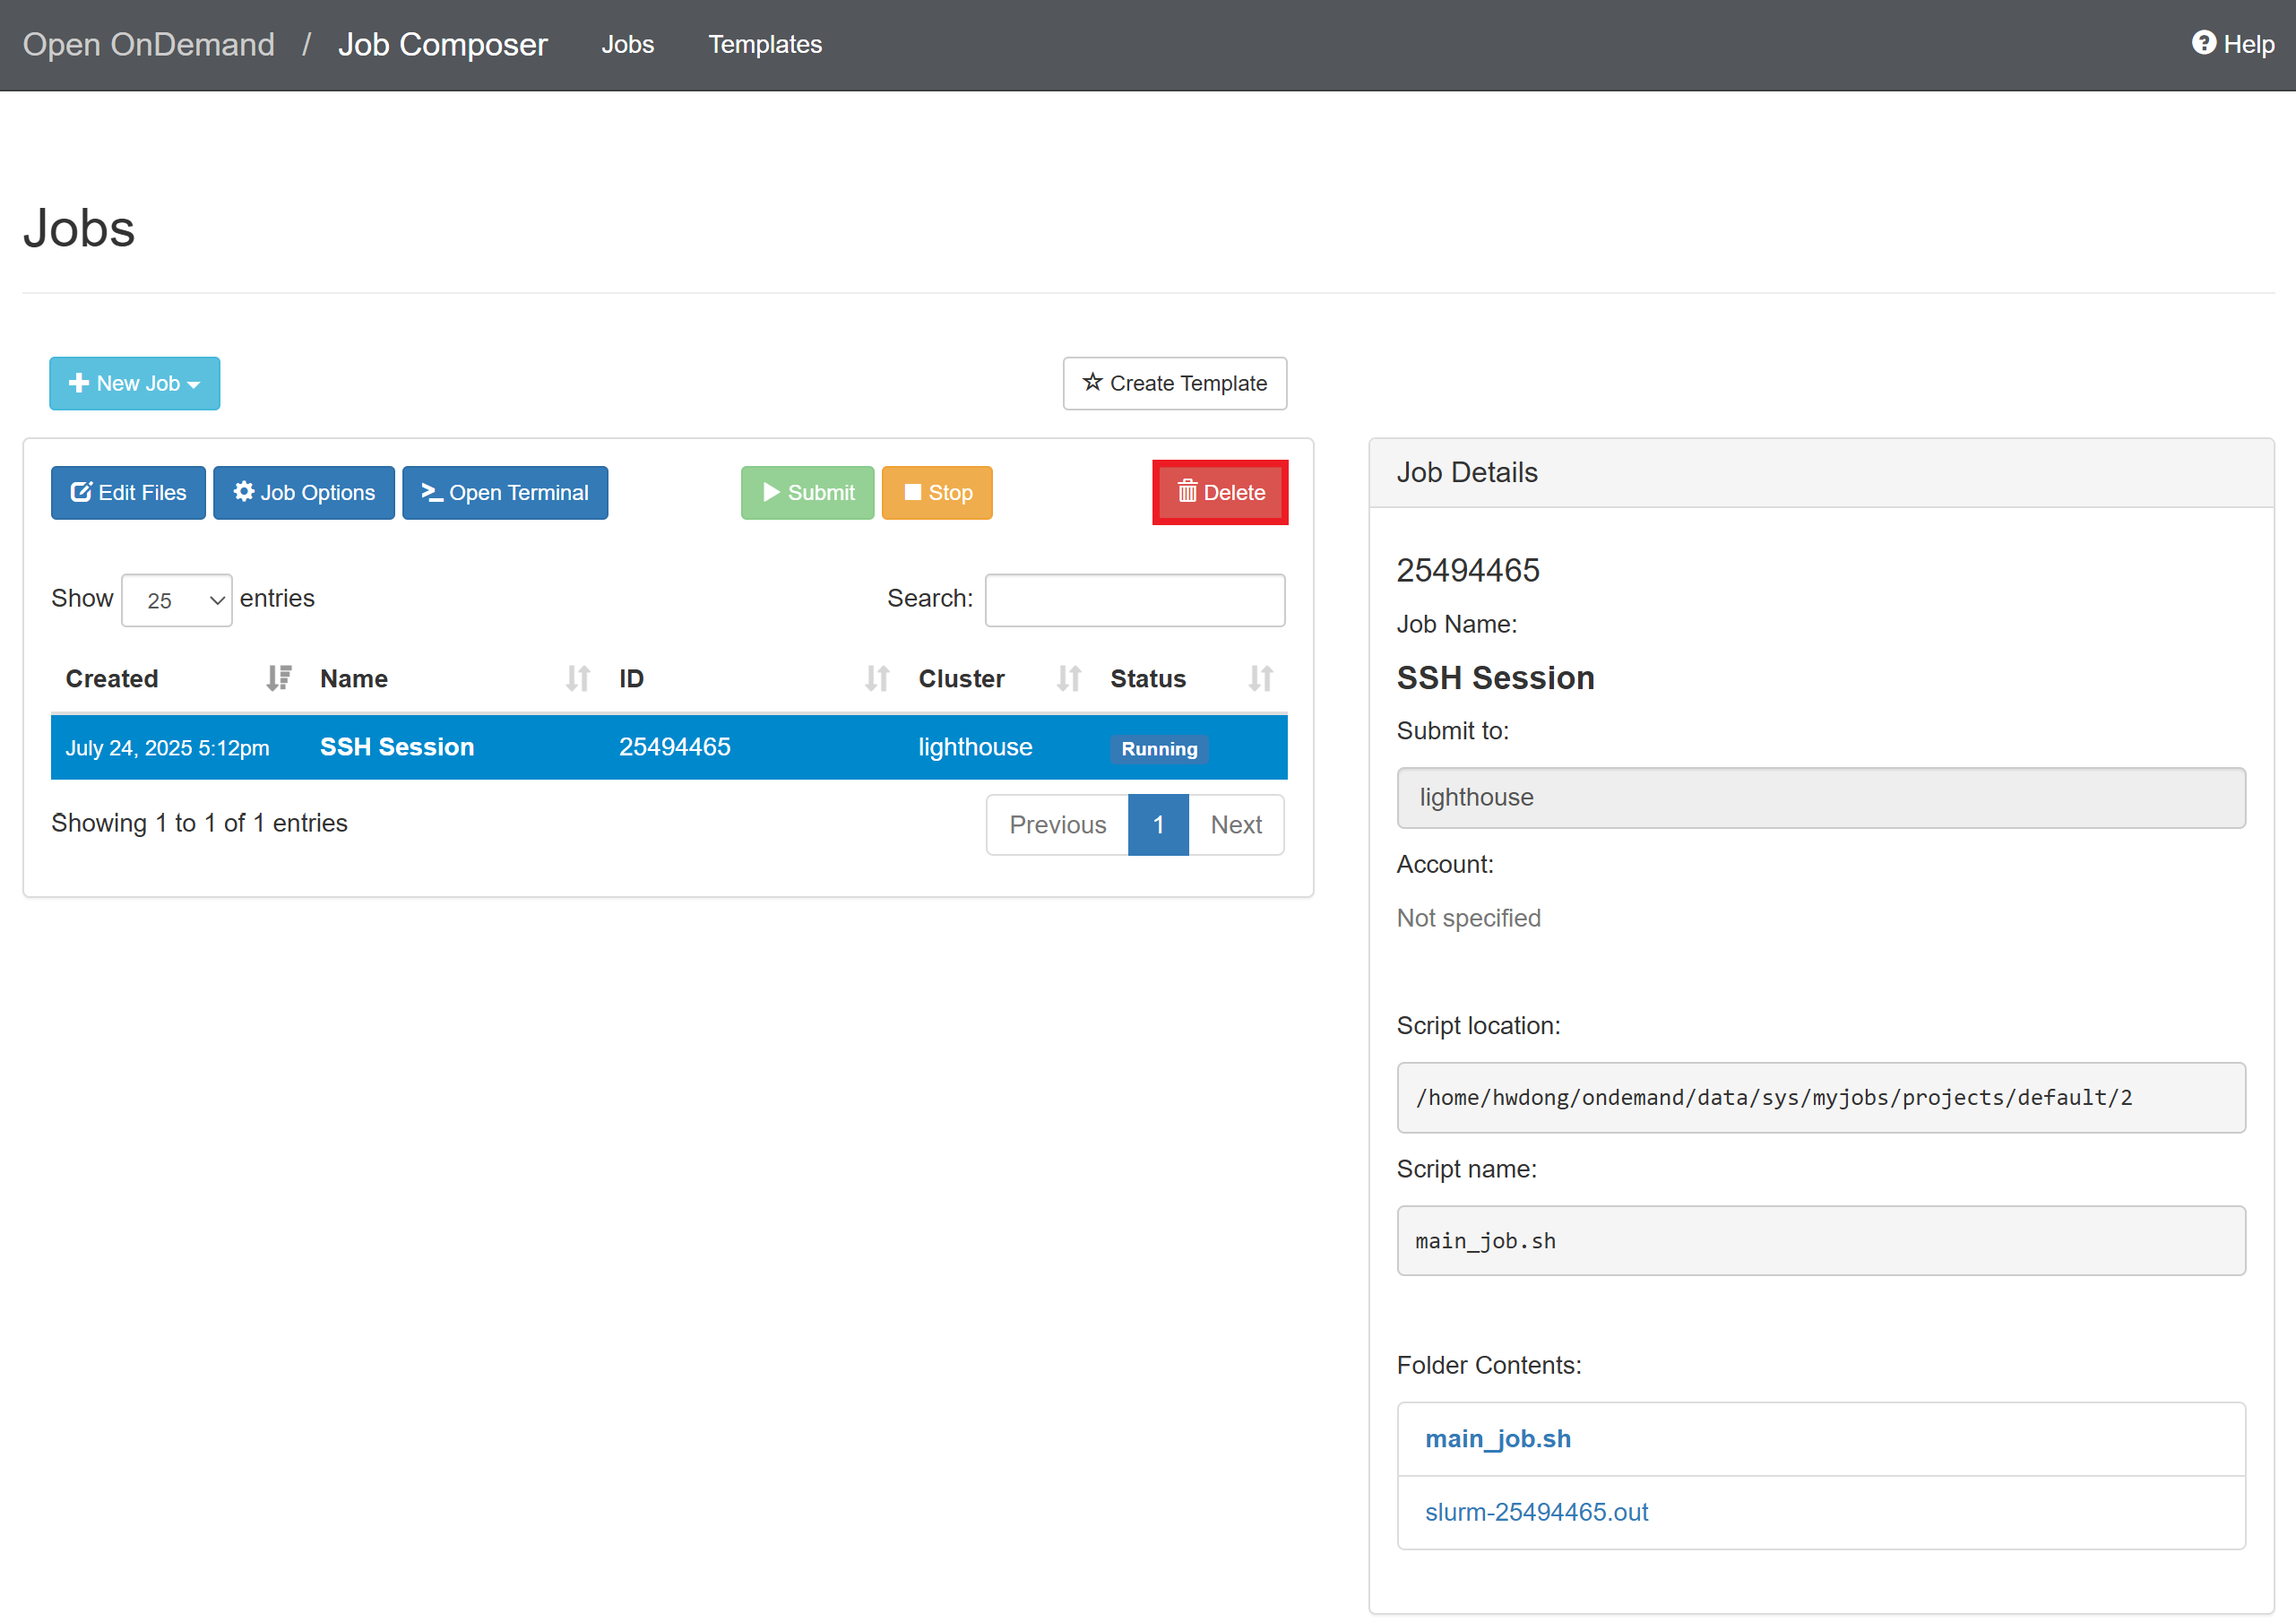
Make sure to delete the job after your workload is finished
Creating a Job Template
You can create a template to save some time from editing the job script every time.
-
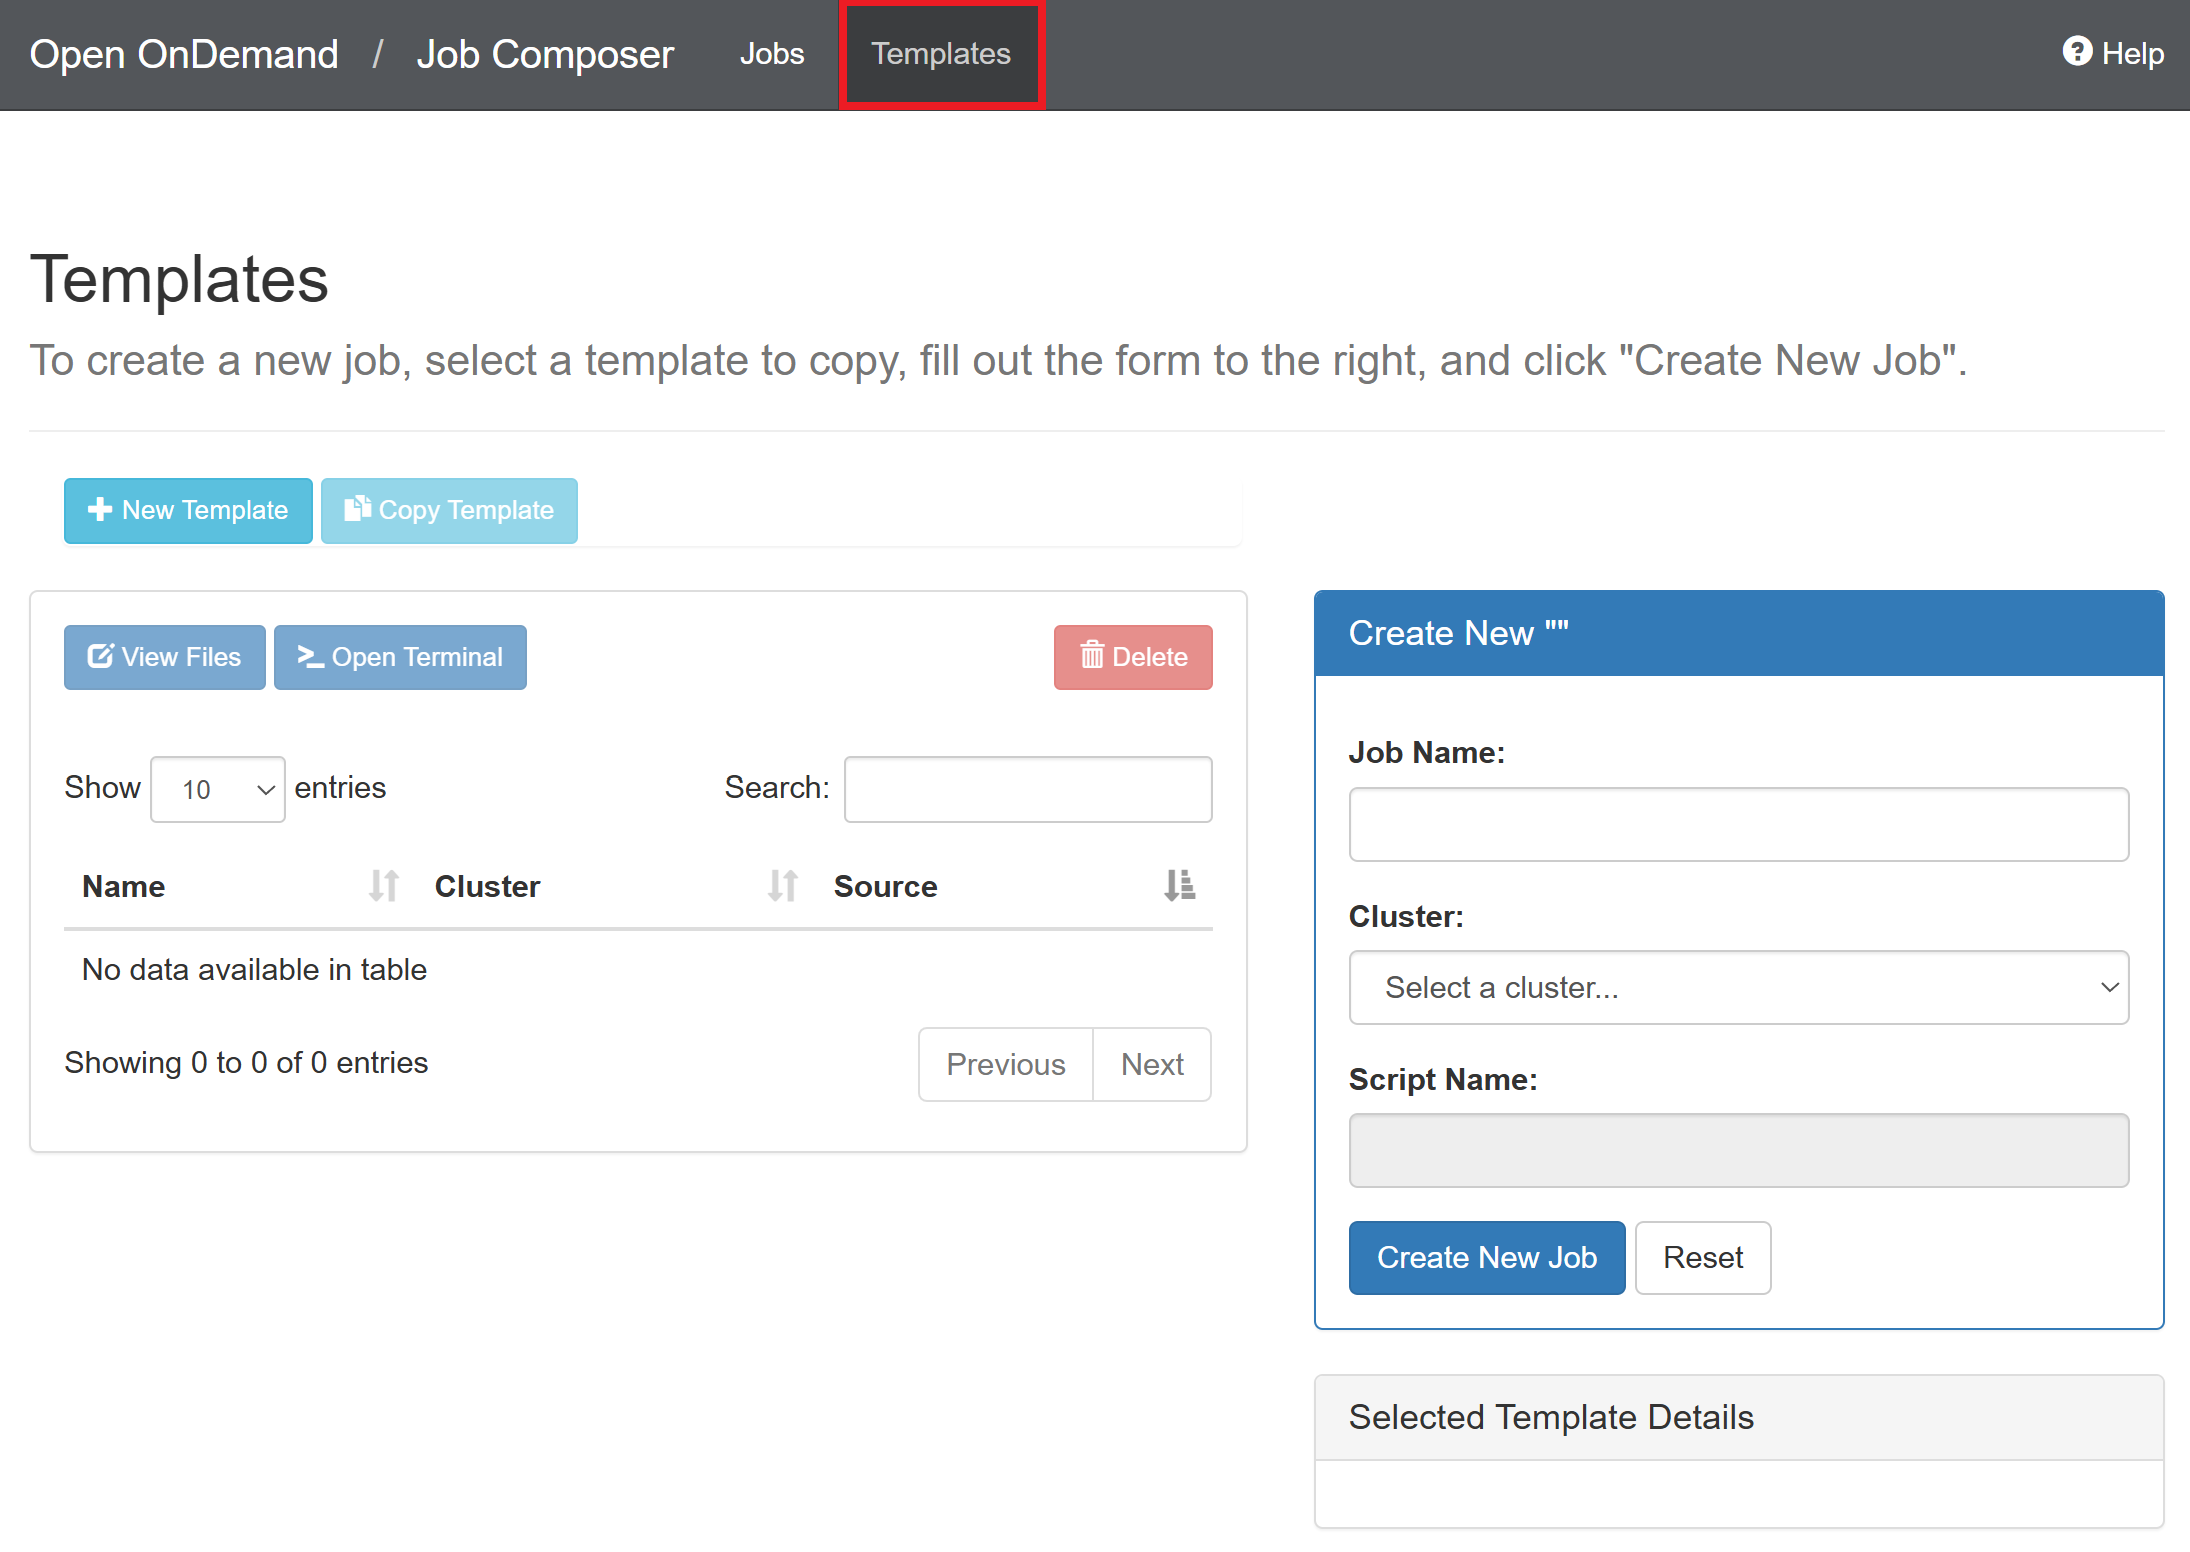
Navigate to the “Templates” tab
-
Click “New Template”

-
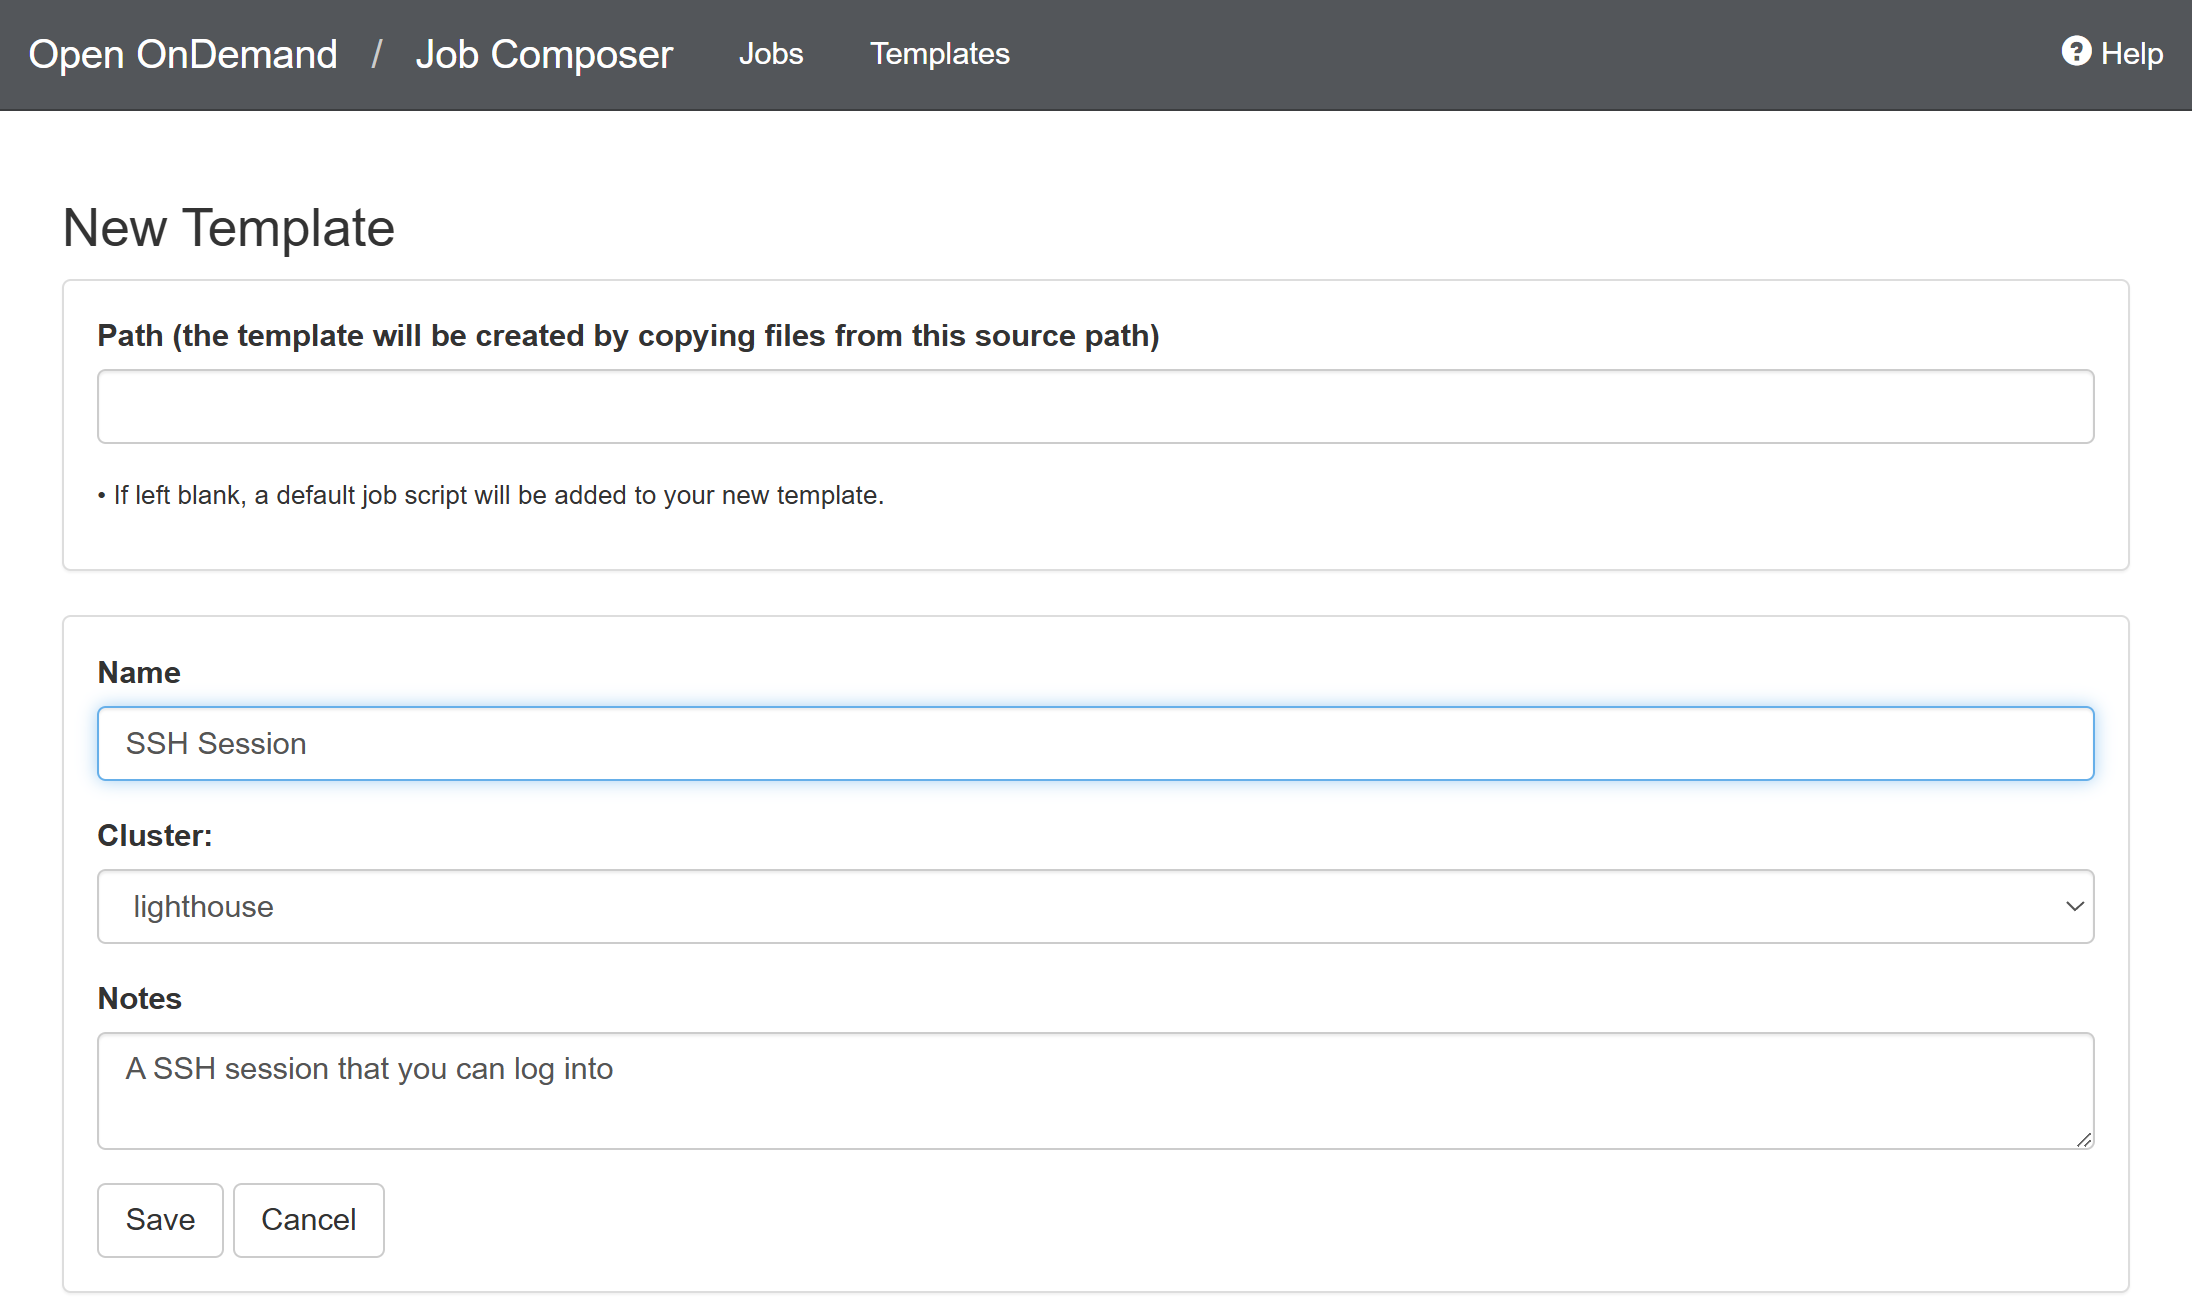
Enter the template name and click “Save”
-
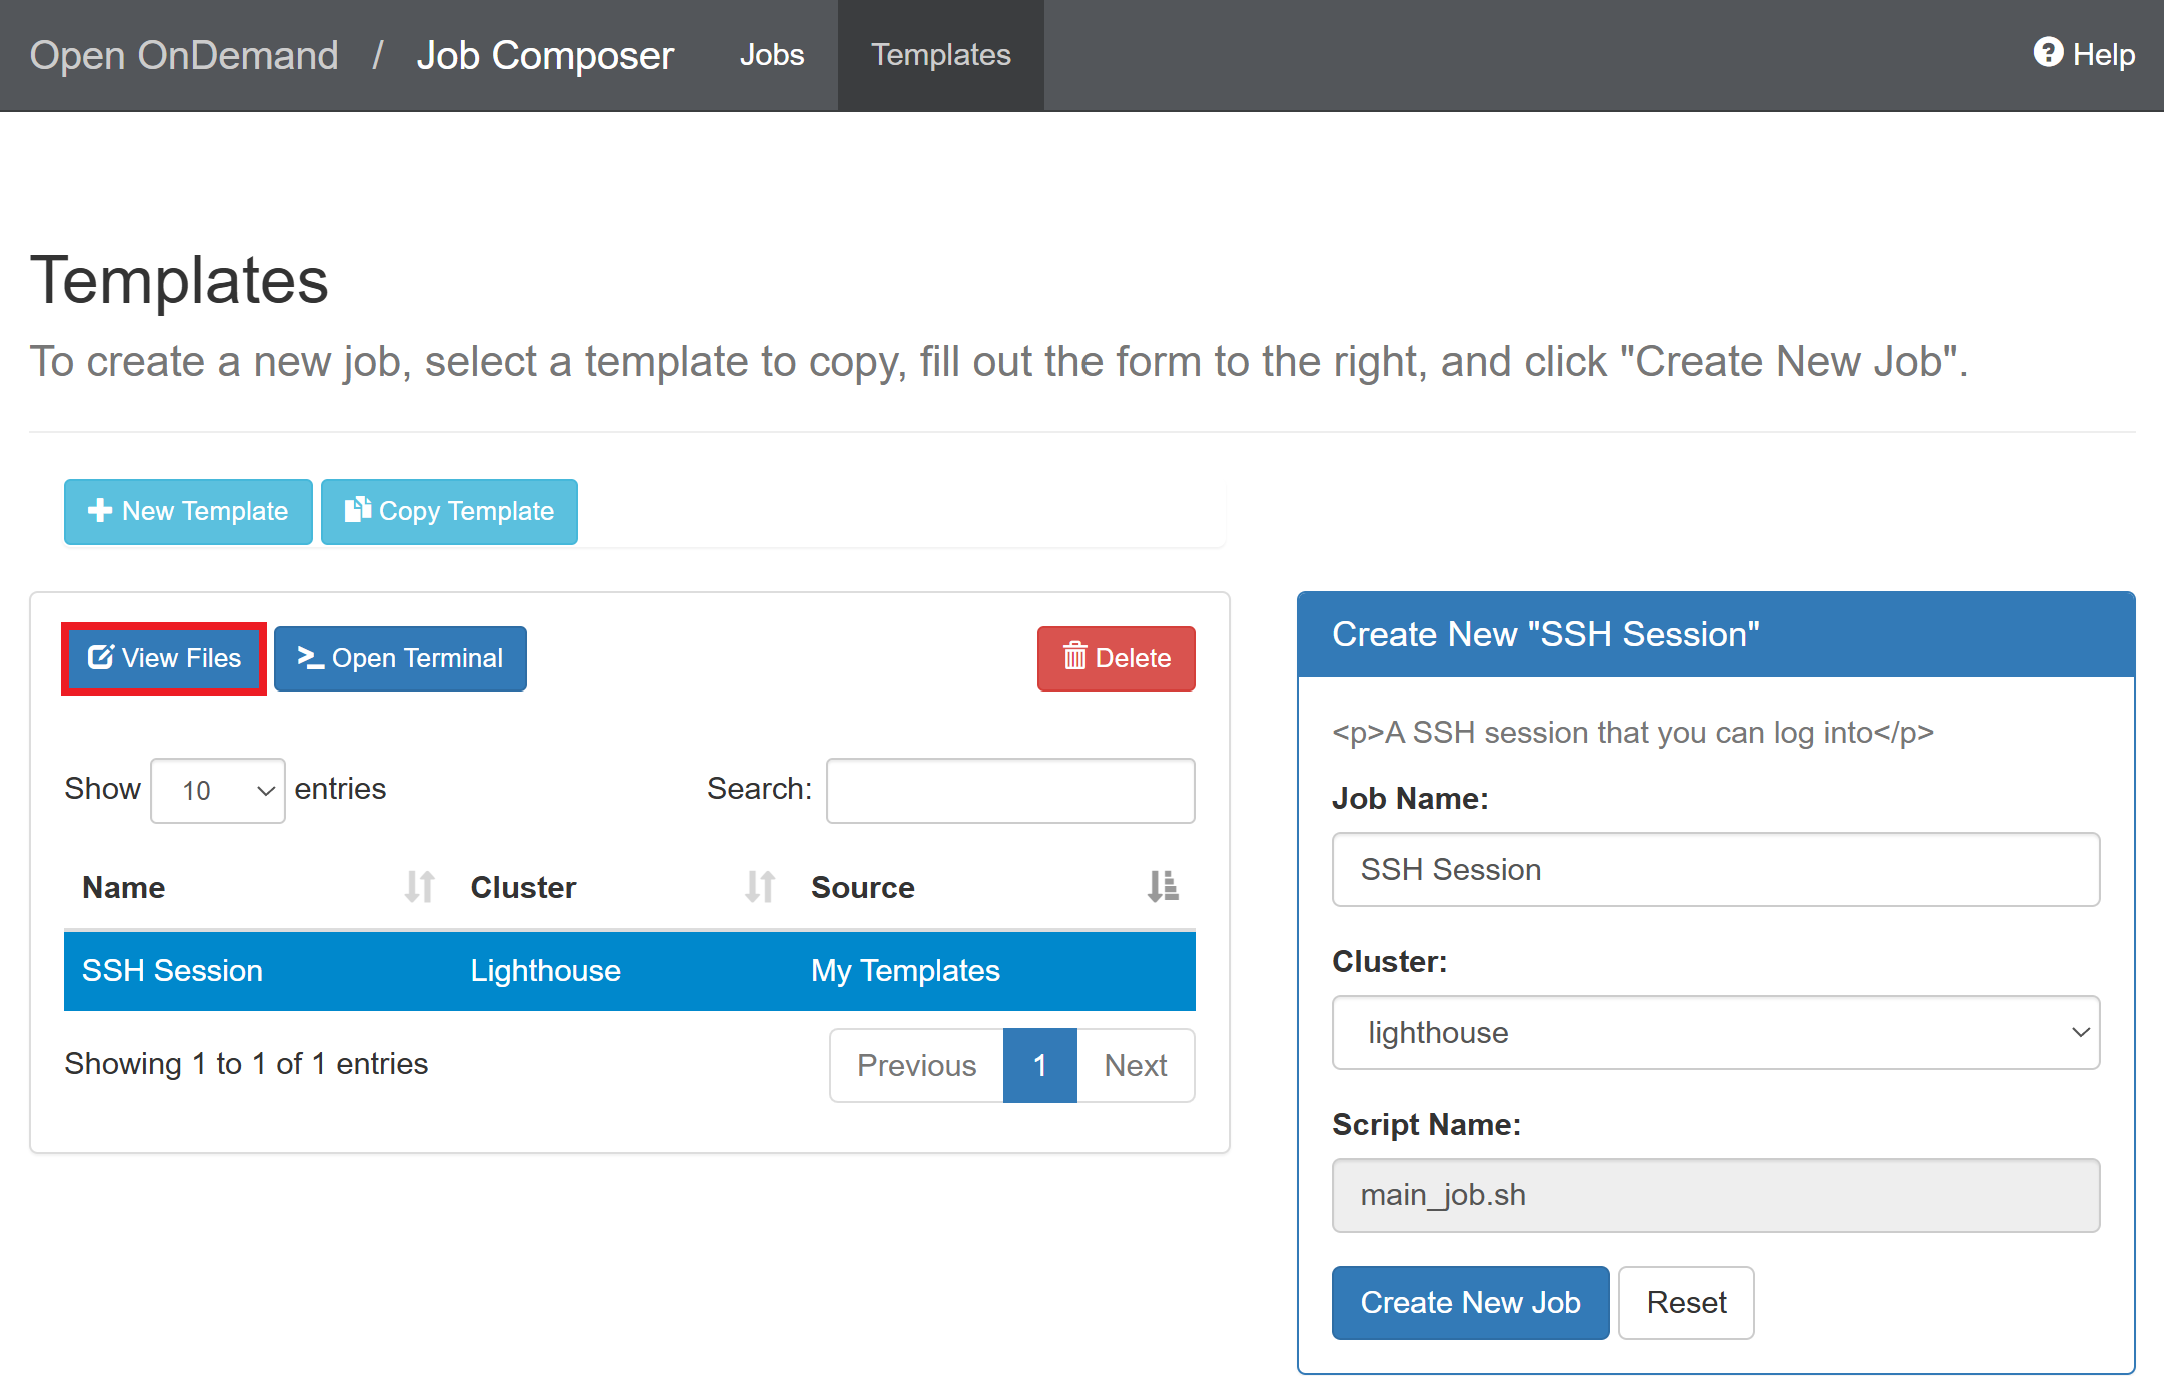
Select the created template and click “View Files”
-
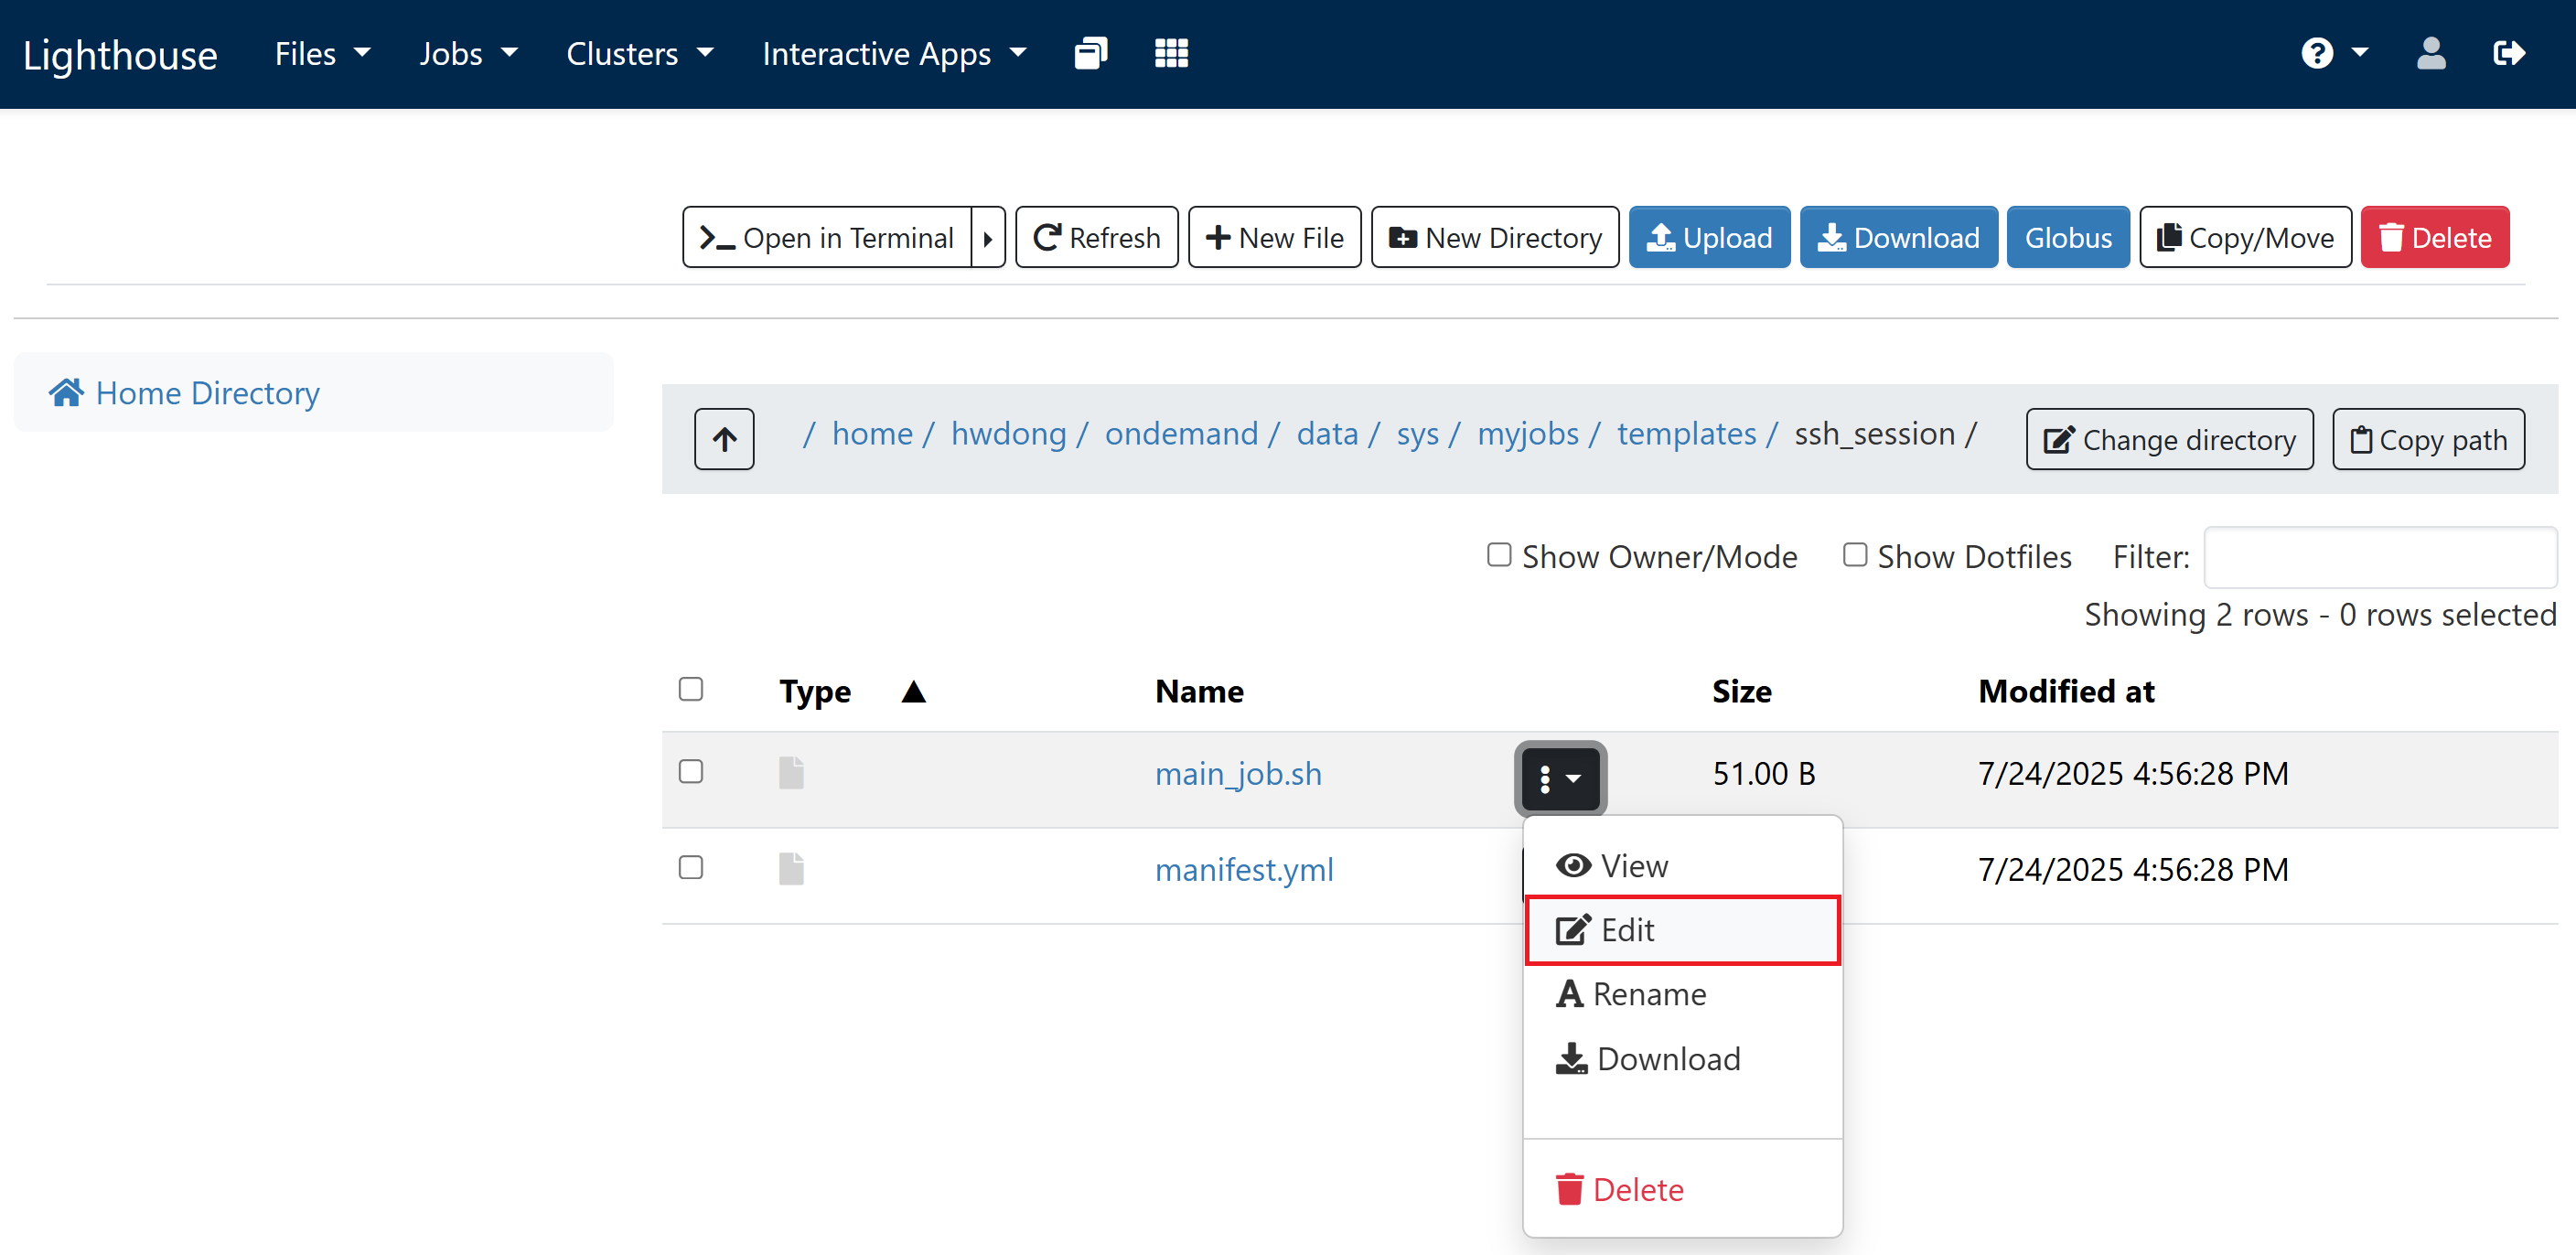
Click the triple dots next to “main_job.sh” and click “Edit”
-
Replace everything in the editor with the following and click “Save”
This will request 1 GPU with 4 CPUs and 48 GB RAM for 2 hours on Great Lakes. Adjust the time limit (in the format of
D-HH:MM:SS) if the wait time is too long. See above for configuration suggestions.#!/bin/bash #SBATCH --account=pat464564w26_class #SBATCH --partition=spgpu #SBATCH --cpus-per-task=4 #SBATCH --mem=48G #SBATCH --gres=gpu:1 #SBATCH --time=2:00:00 echo $SLURMD_NODENAME tail -f /dev/null -
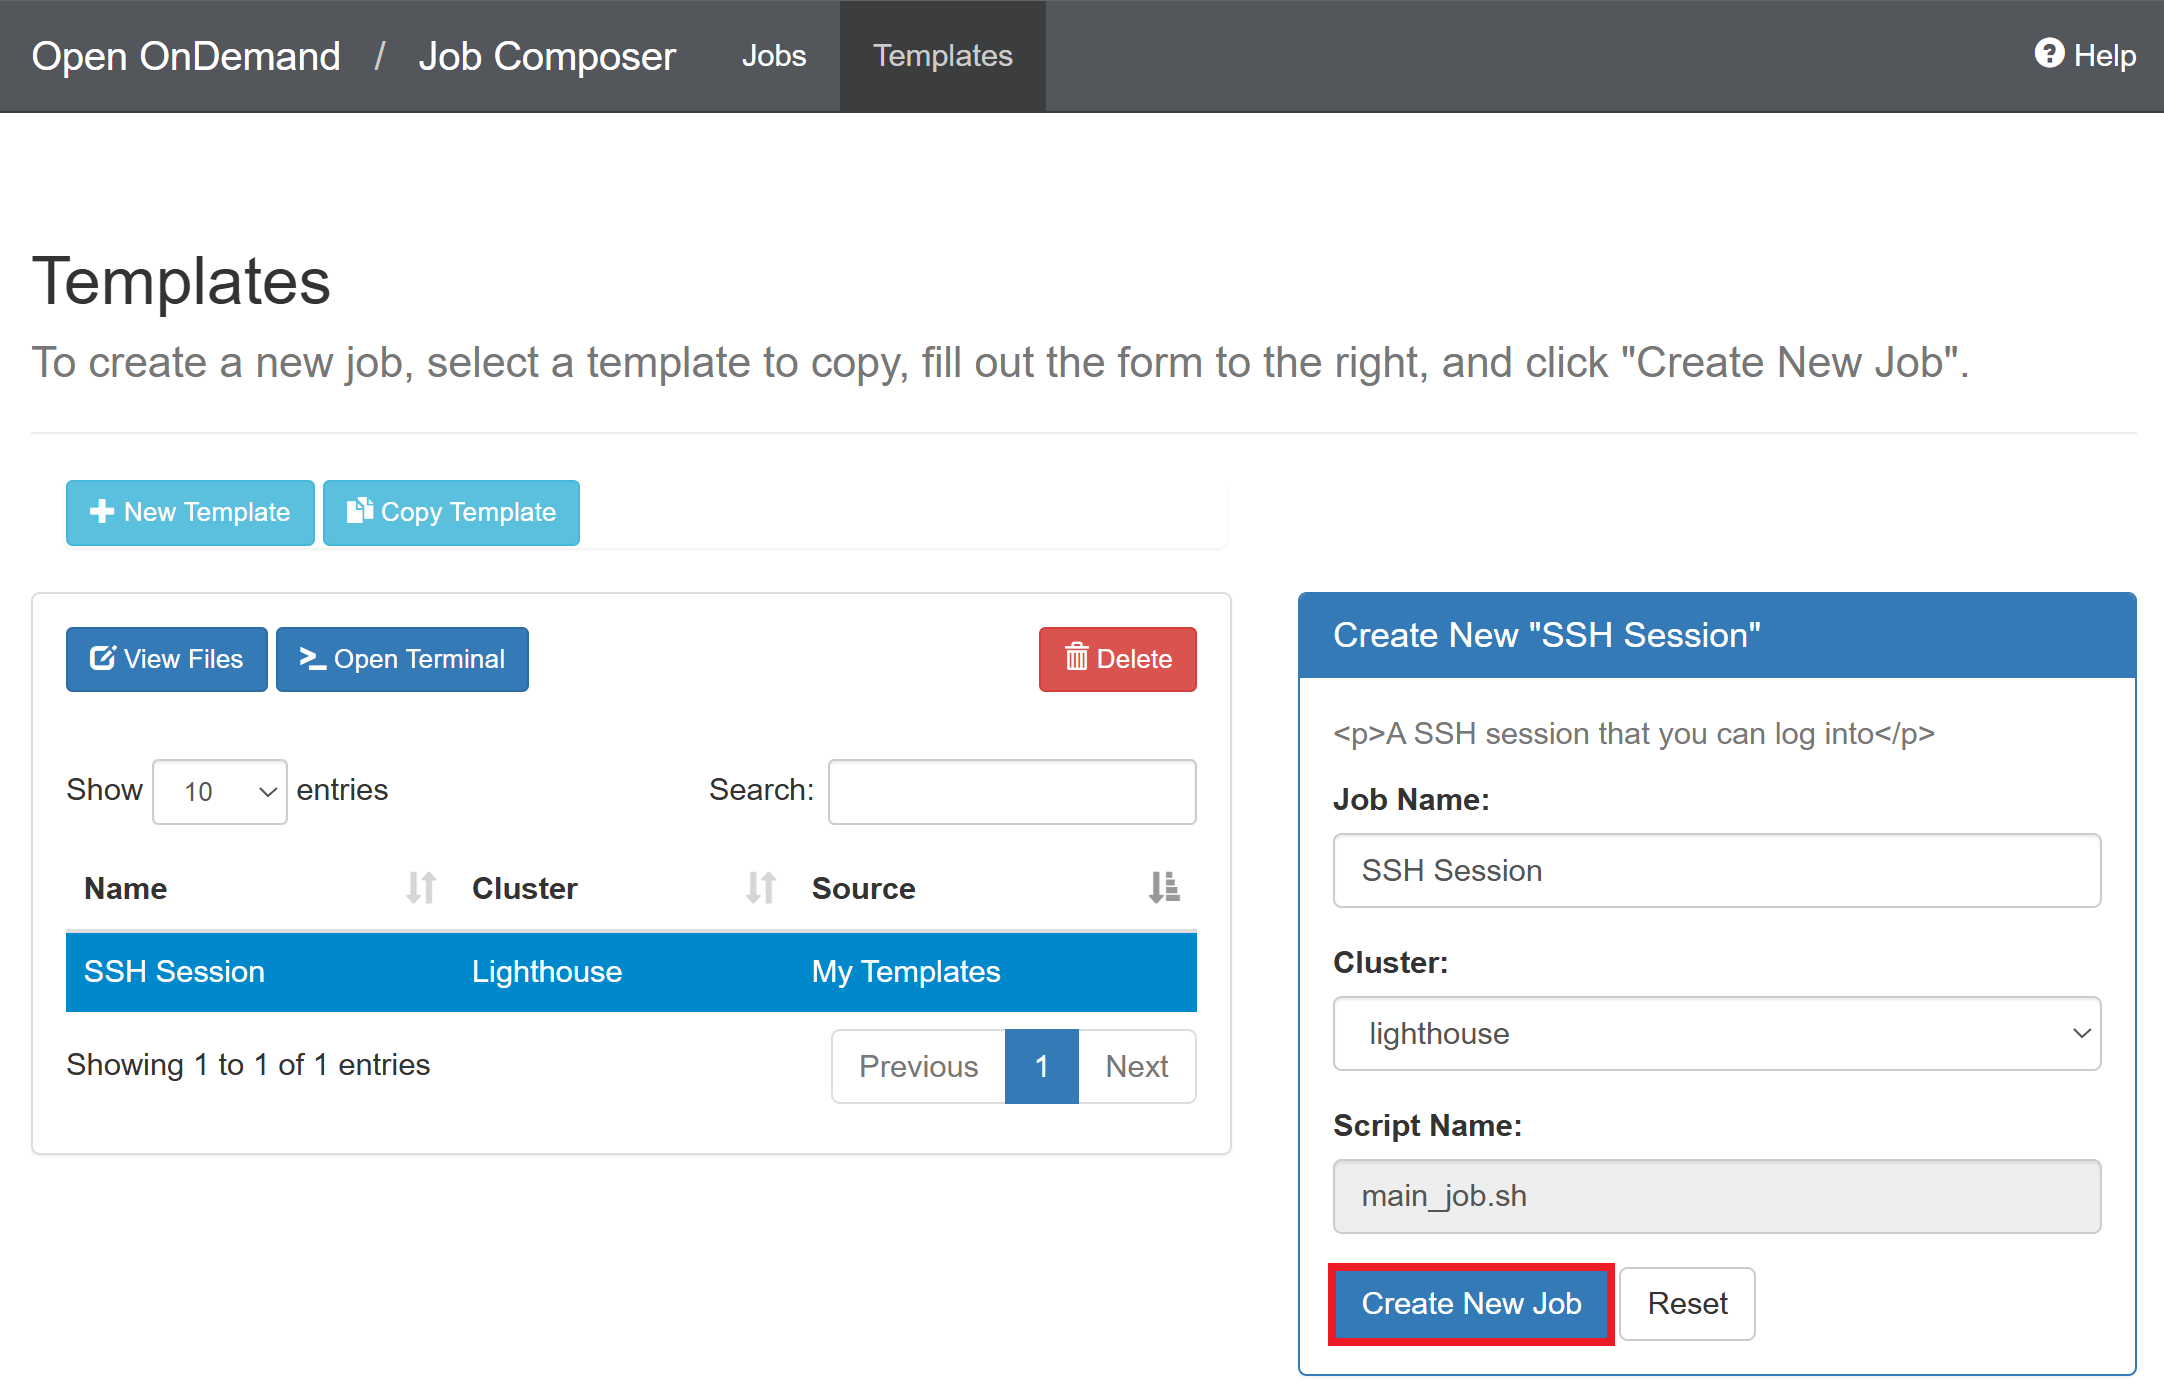
Return to the previous page and click “Create New Job”
Connecting via SSH on VS Code
-
Add the following lines to the SSH configuration file (usually at
~/.ssh/config):Host greatlakes-login HostName greatlakes.arc-ts.umich.edu User {UNIQNAME} Host gl*.arc-ts.umich.edu User {UNIQNAME} ProxyJump greatlakes-loginOn Great Lakes, the node name will change when you launch a new job as you’ll be assigned to one of the many compute nodes on the cluster.
-
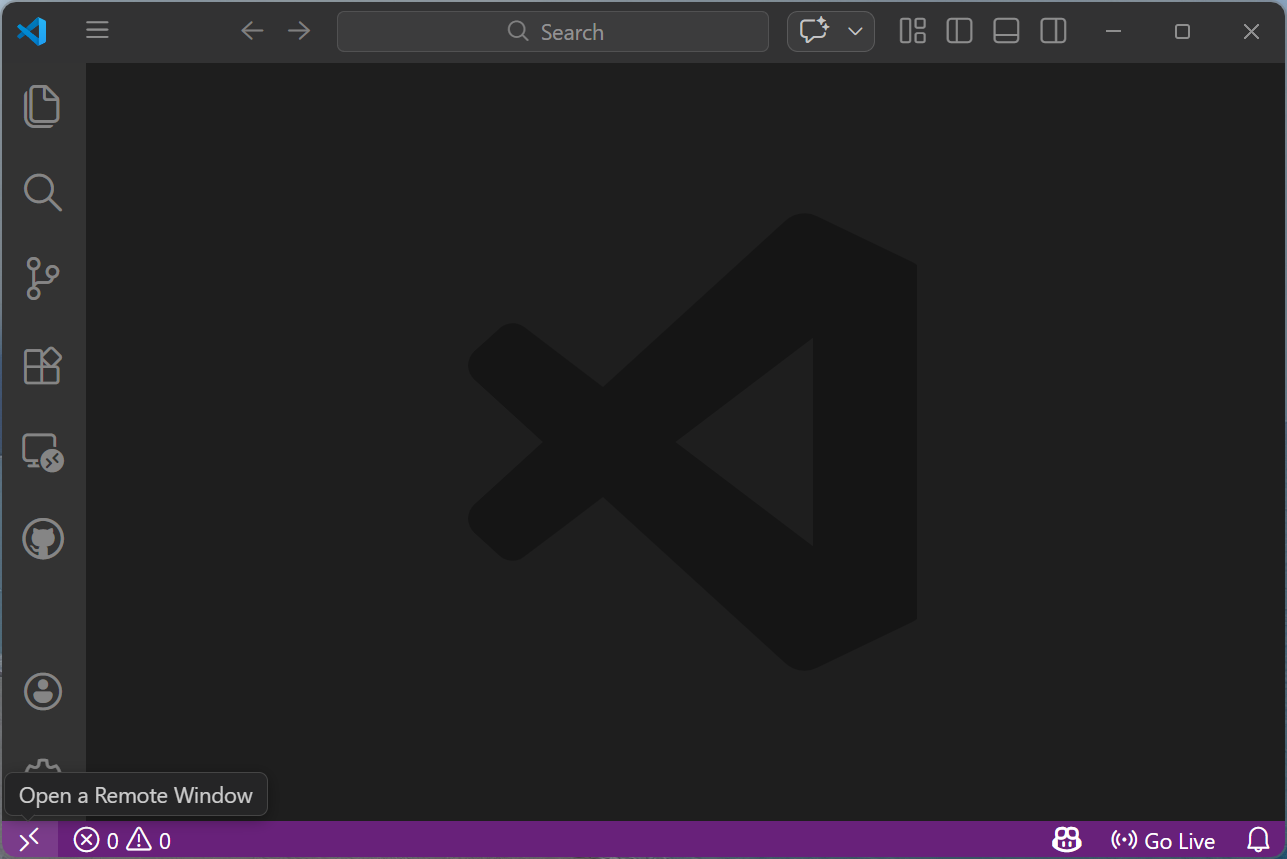
Click “Open Remote Window” at the bottom left of the VS Code window
-
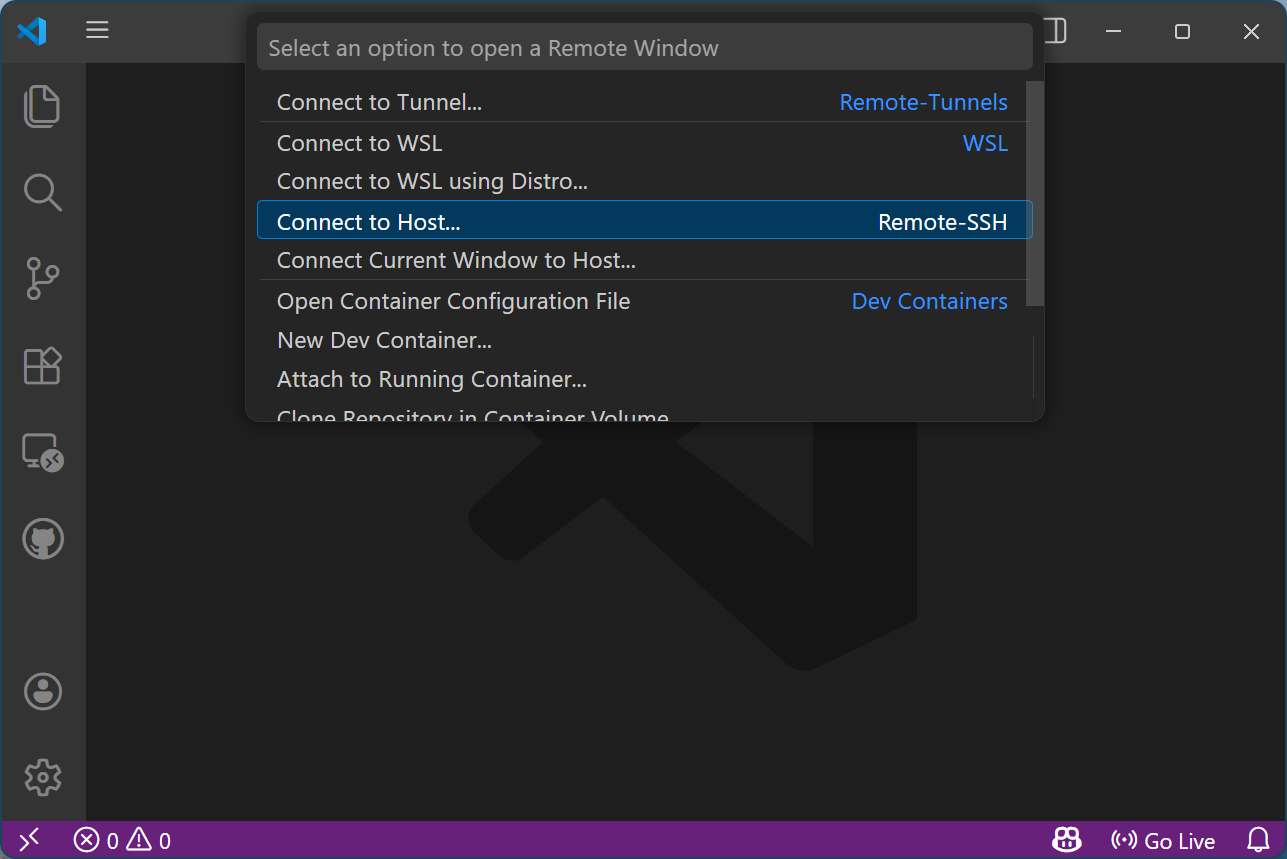
Click “Connect to Host”
-
Click “greatlakes” or “lighthouse”

-
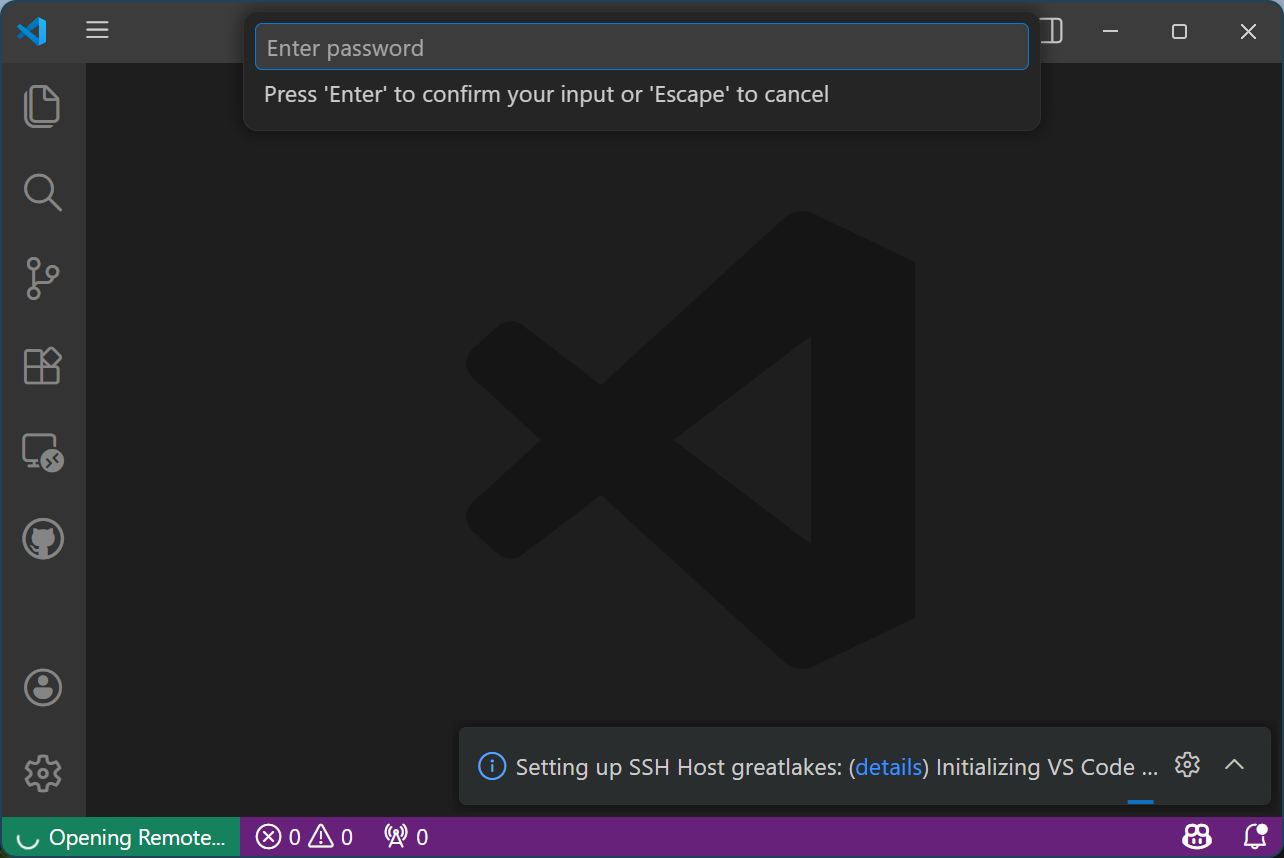
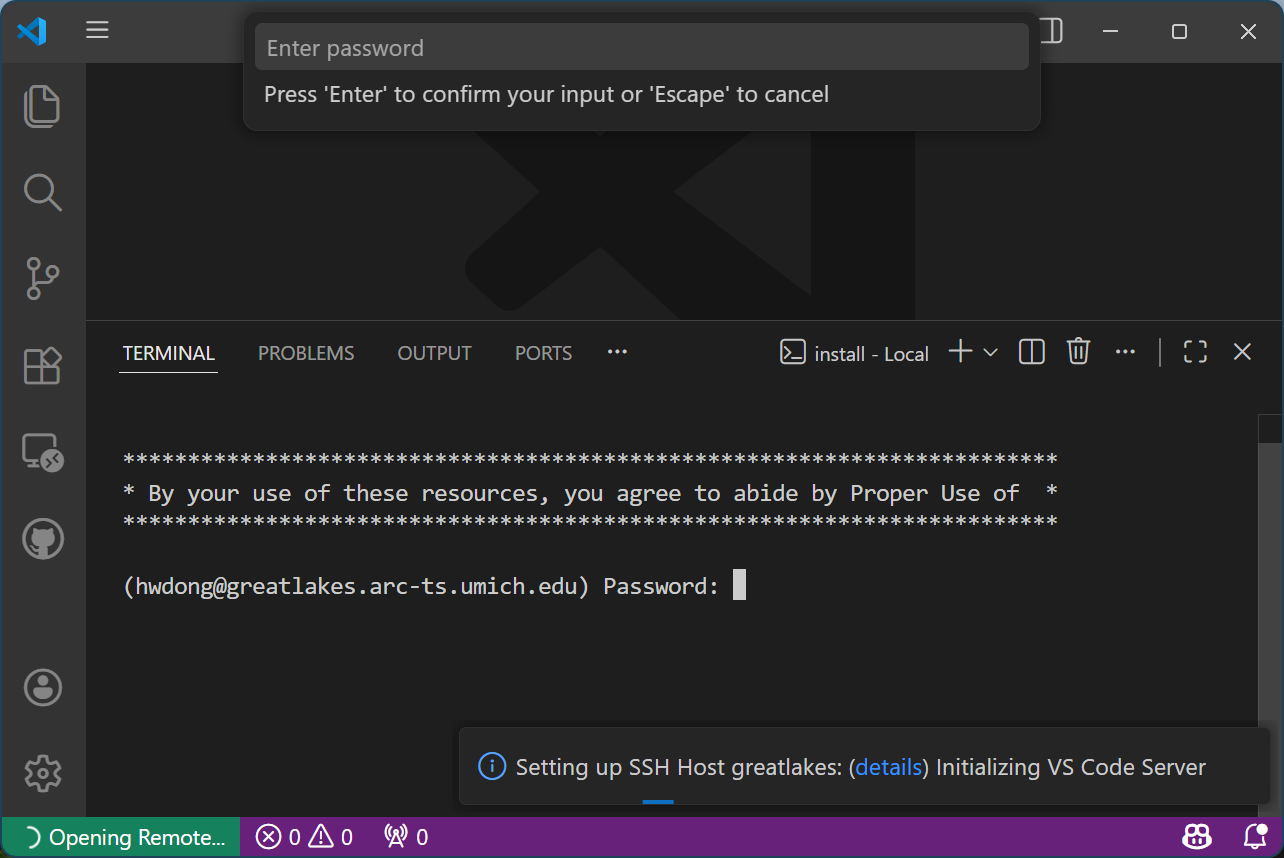
Click the highlighted “details” link in the pop-up box at the bottom right
Ignore the pop-up password prompt at the top
-
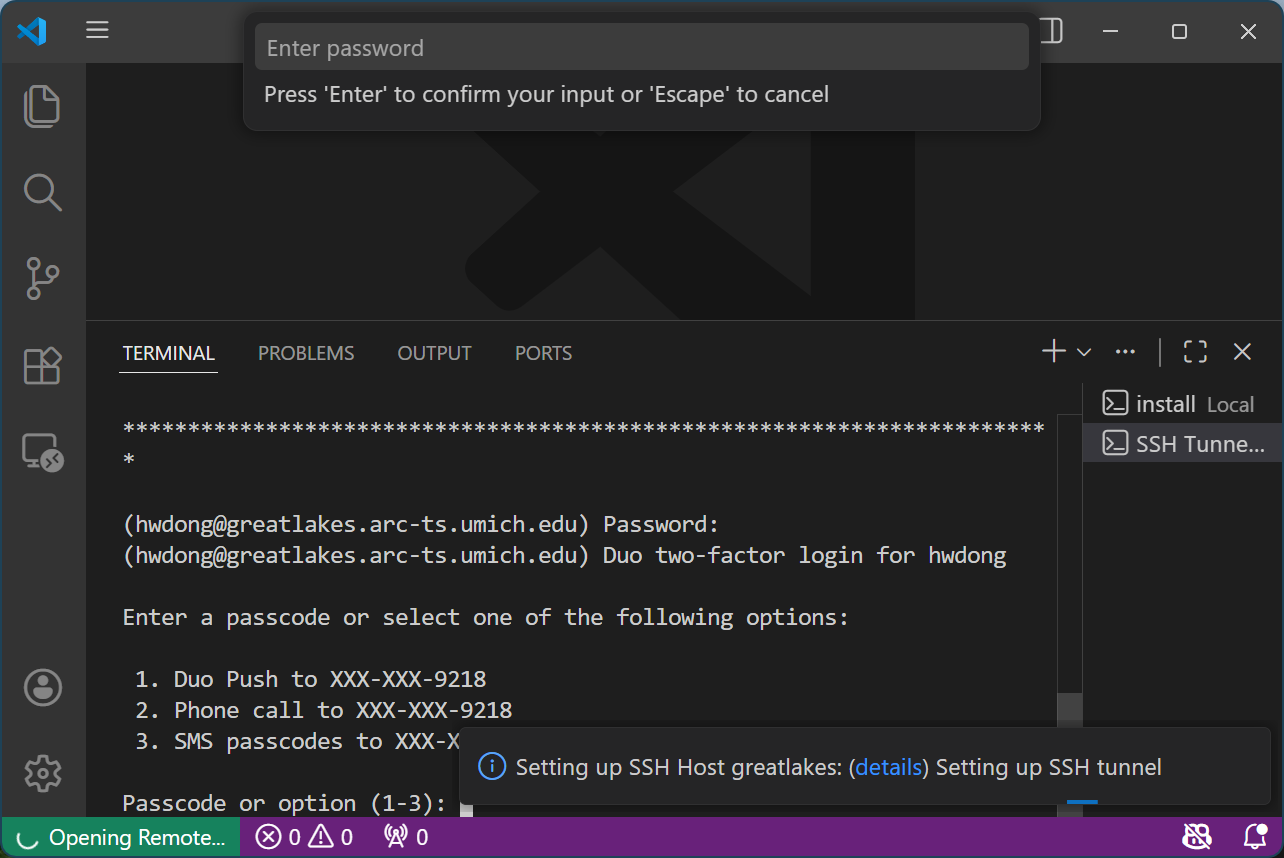
Enter your password at the terminal tab and hit “Enter”
Ignore the pop-up password prompt at the top
-
Authenticate through Duo for two-factor authentication
-
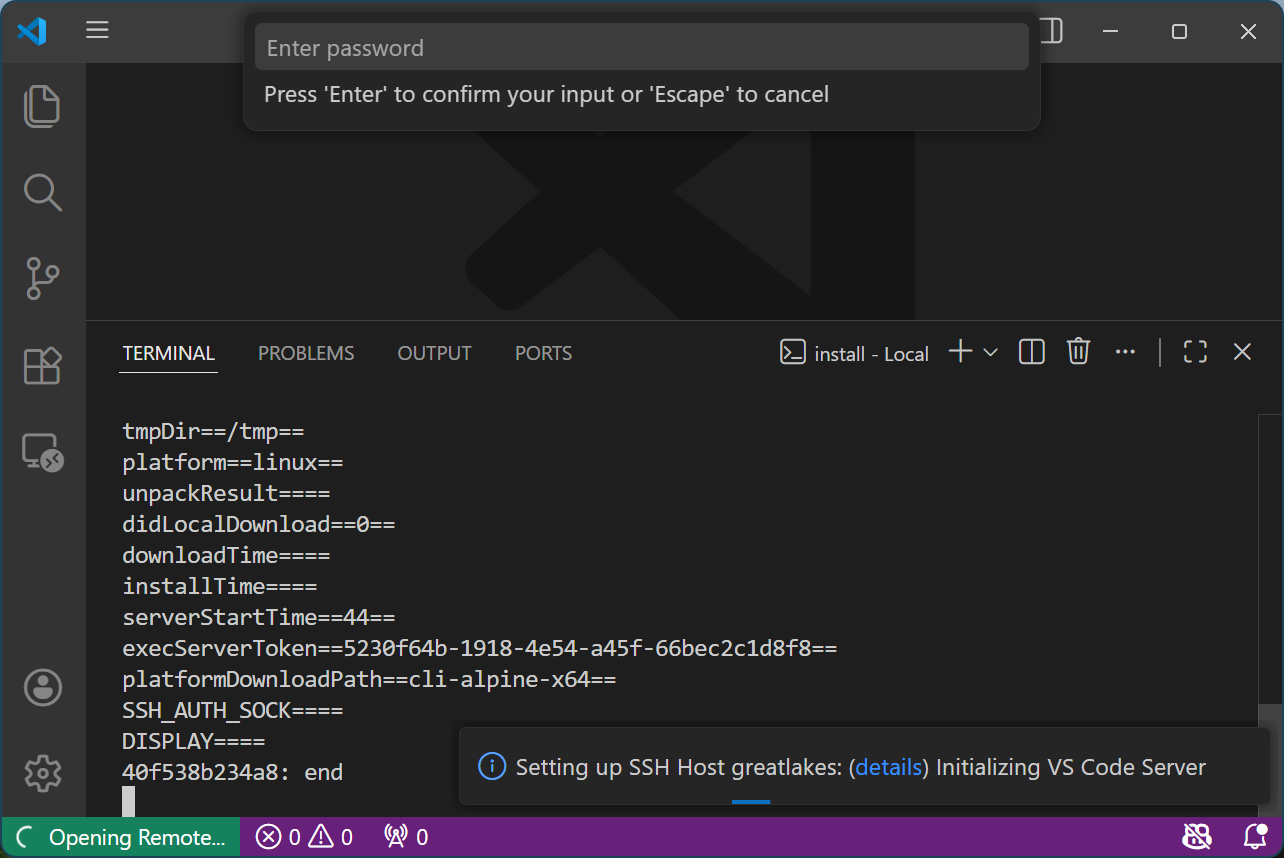
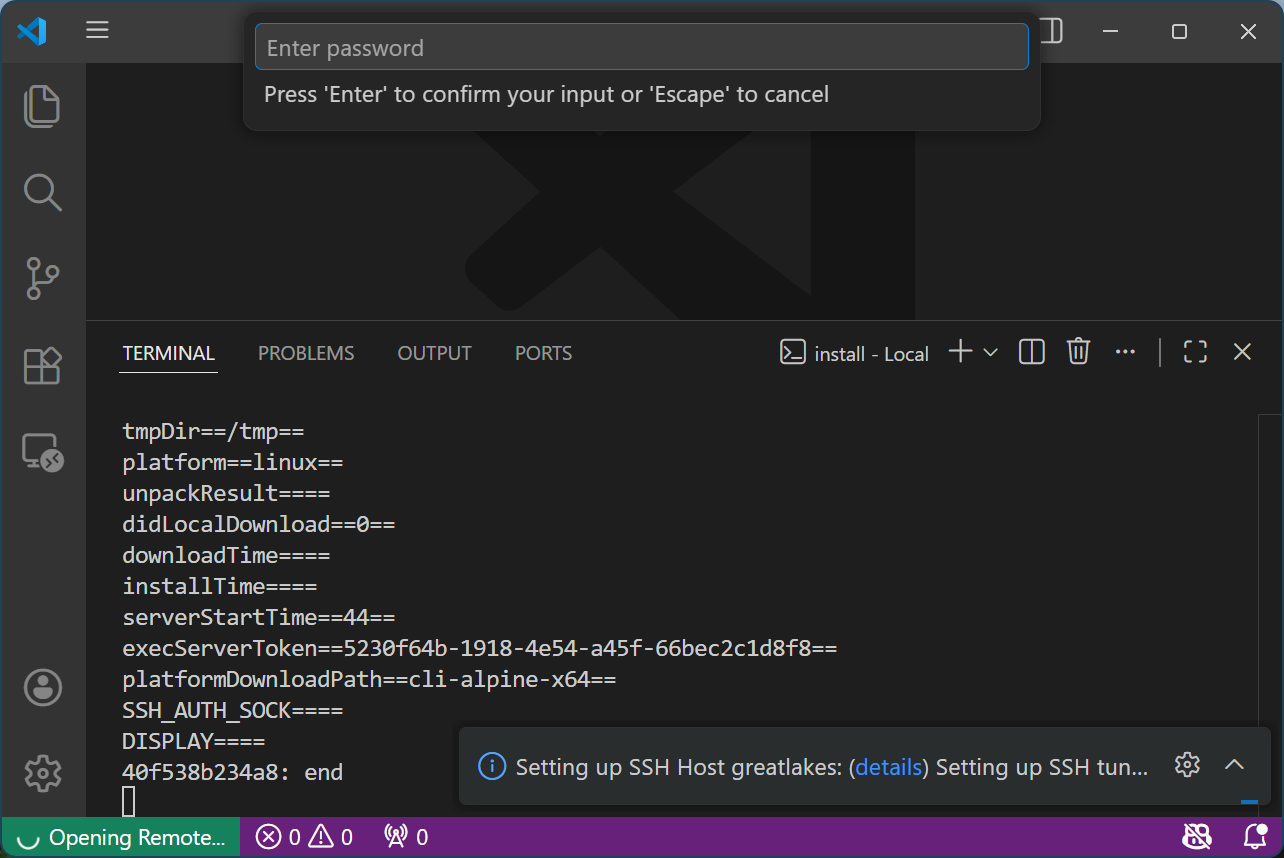
Click the pop-up password prompt at the top and hit “Enter” 2-3 times until the pop-up prompt box at the bottom right changes from “Initializing VS Code Server” to “Setting up SSH tunnel”
-
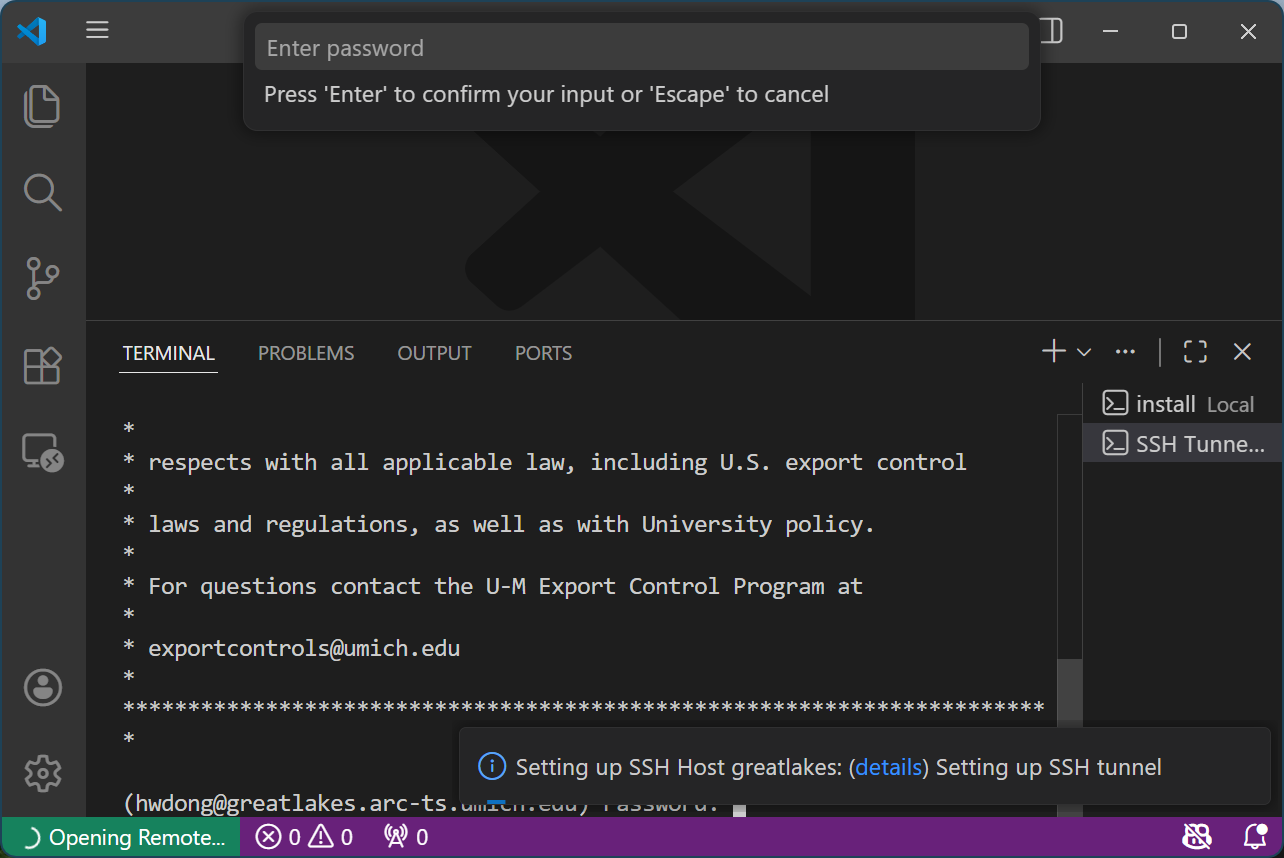
Click the highlighted “details” link in the pop-up box at the bottom right
Ignore the pop-up password prompt at the top
-
Enter your password at the terminal tab and hit “Enter”
Ignore the pop-up password prompt at the top
-
Authenticate through Duo for two-factor authentication
-
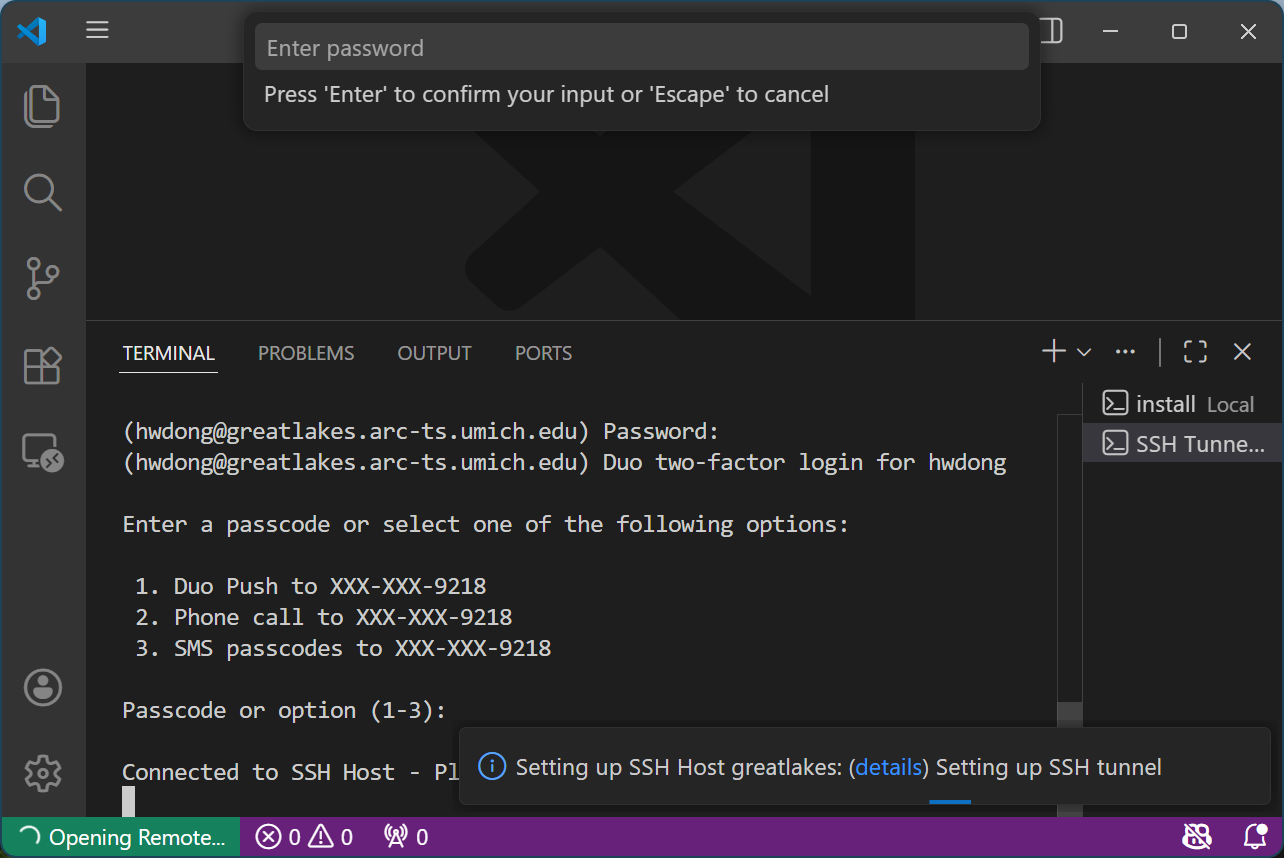
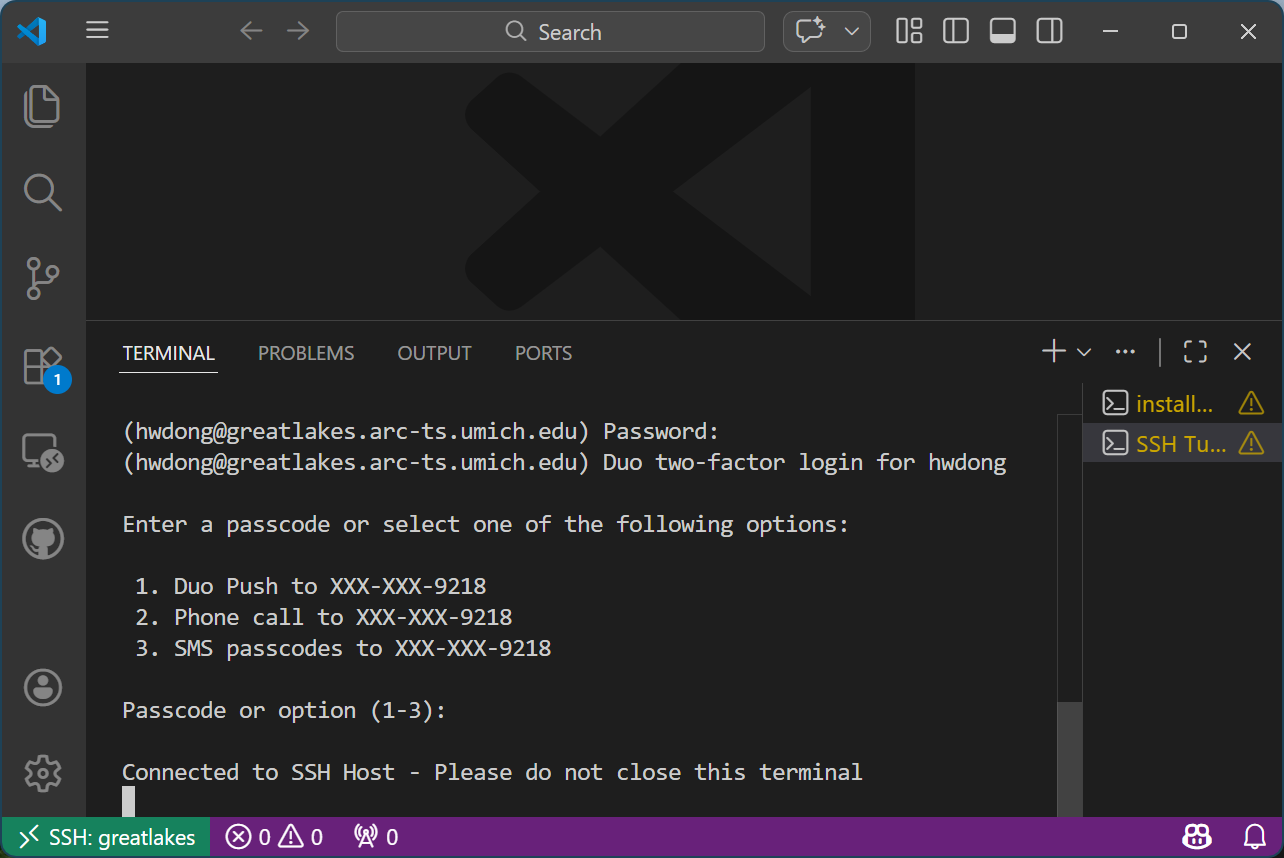
It should say “Connected to SSH Host - Please do not close this terminal”
-
Click the pop-up password prompt at the top and hit “Enter” 2-3 times until the pop-up box at the bottom right disappears (you should also see “SSH: greatlakes” at the bottom left)
-
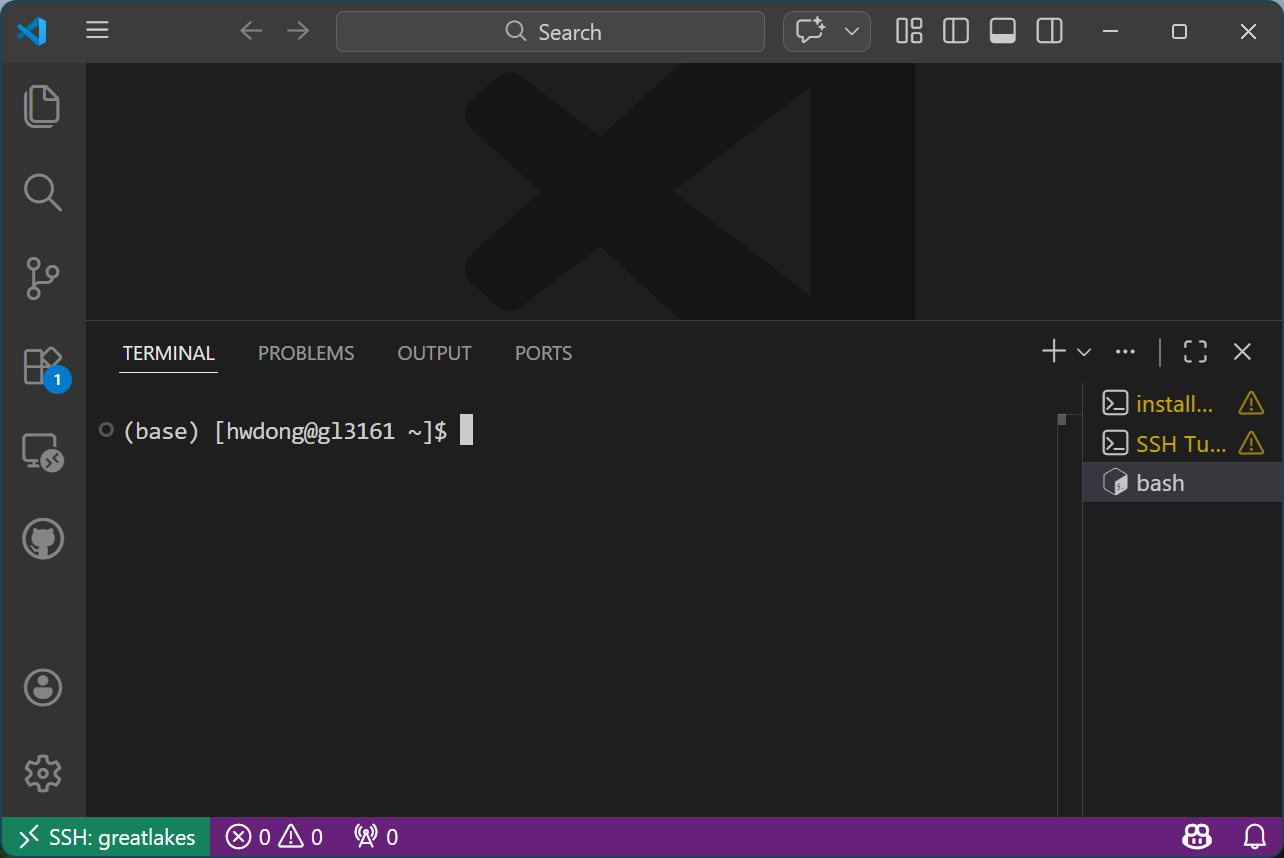
Now, you may start coding in VS Code! You can click the “+” sign at the right to open a terminal to verify the connection.
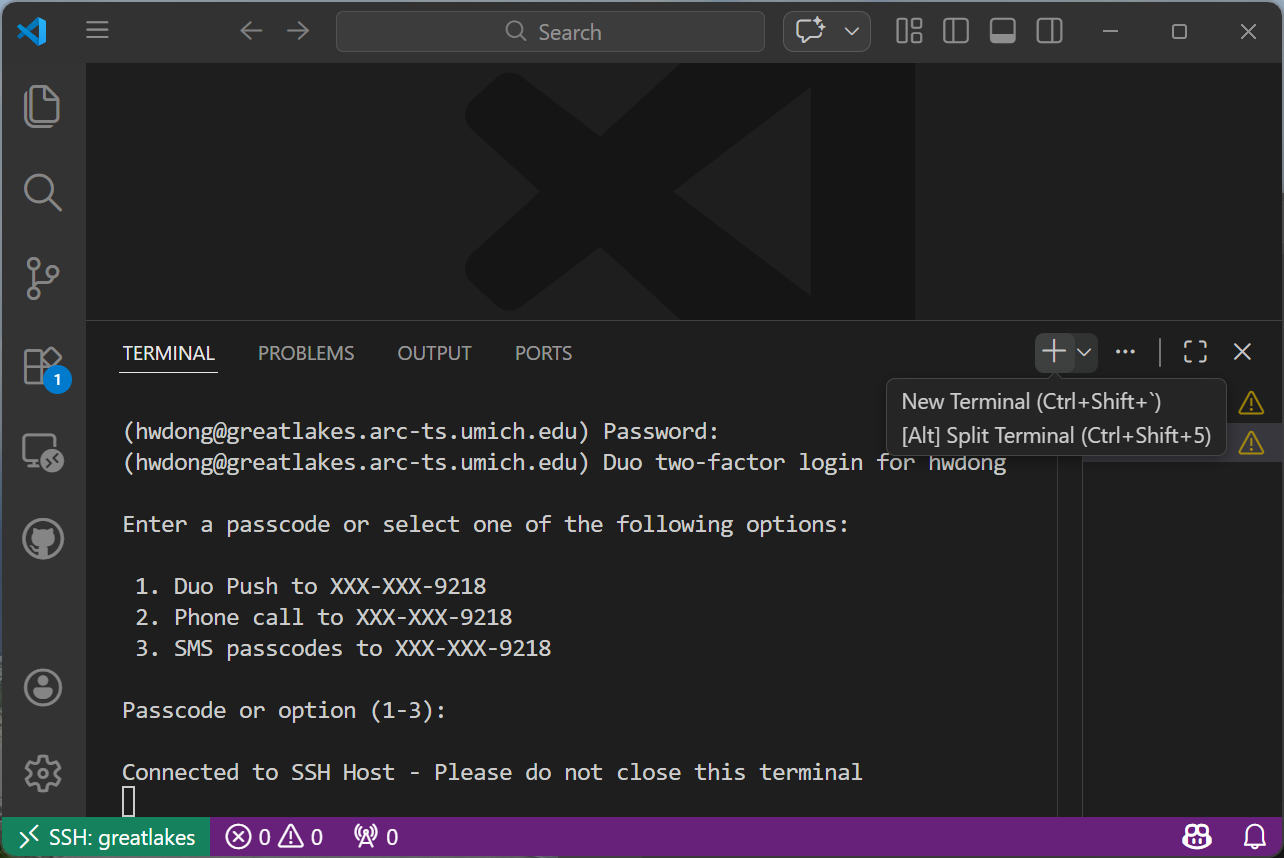
Once you click it, you should see that you’re connected to the compute node:
Setting Up Your Own Base Conda
Follow the instructions below if you want to set up your own base Conda other than the default one installed on the cluster.
- Follow the official instructions to install Conda
-
Update the Slurm script as follows:
#!/bin/bash
#SBATCH --account=aimusic_project
#SBATCH --partition=aimusic_project
#SBATCH --cpus-per-task=8
#SBATCH --mem=62G
#SBATCH --gres=gpu:1

CONDA_EXE=/home/{UNIQNAME}/miniconda3/bin/conda
CONDA_PREFIX=/home/{UNIQNAME}/miniconda3
CONDA_PYTHON_EXE=/home/{UNIQNAME}/miniconda3/bin/python
export PATH="/home/{UNIQNAME}/miniconda3/bin:/home/{UNIQNAME}/miniconda3/condabin:$PATH"

echo $SLURMD_NODENAME
tail -f /dev/null